Vymo Docs message template
Send a customized message to a lead or partner using the message option on the lead or partner details page on the mobile app. The spectrum of message templates can range from a "Welcome Aboard" message to a message requesting KYC details. The message is sent either from Vymo gateway or client/server, hence has a verified header.
Using message templates
Use the following steps to send messages using templates on the mobile app:
- Log in to Vymo mobile app.
- Tap the Leads or Partners card.
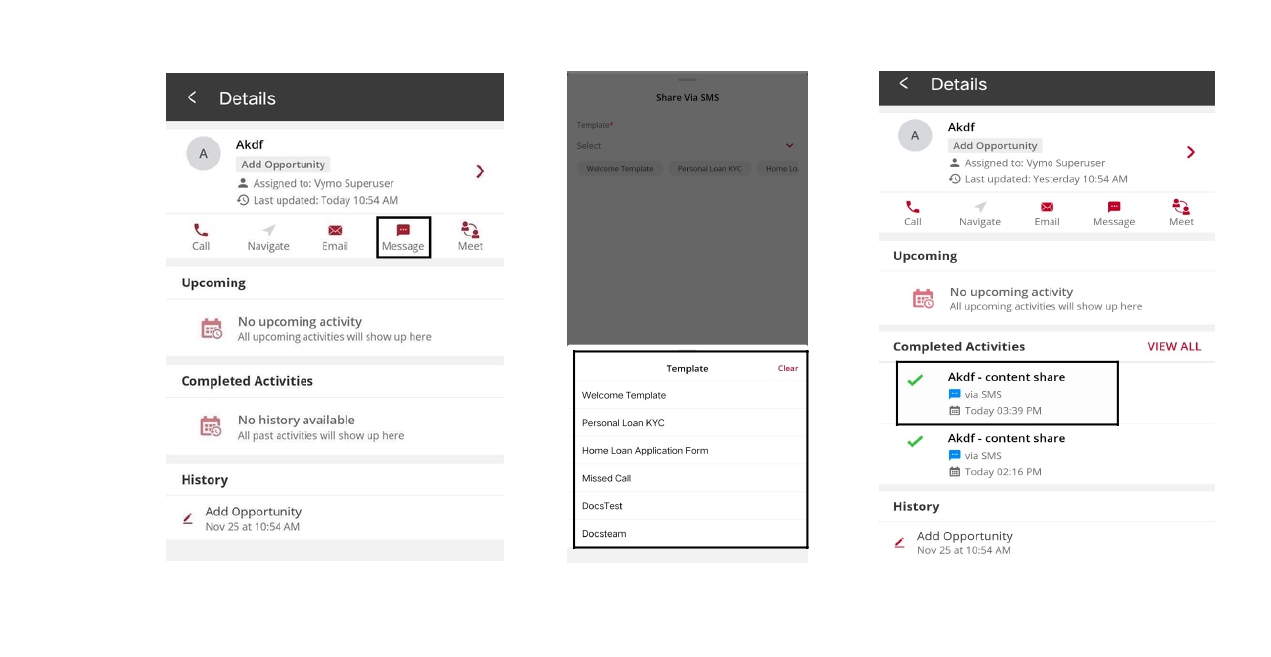
- Select the lead or partner you want to send a message to and tap the Message option.
- Choose a template from set of configured templates or draft a message. SMS is the default medium through which the message is sent. Other messaging applications available on your phone, for example, WhatsApp, LINE chat are configured or incorporated based on your company's requirements.
- Tap Send and check the message delivery status in the Completed Activities section in the lead or partner Details page.
Configuring message templates
To use the message template, the template option has to be enabled. After enabling the template option, configure the Message Center which is the place to add or edit message templates.
Enabling the template option
To enable the use of templates while sending messages, use the following steps:
- Log in to Vymo web app.
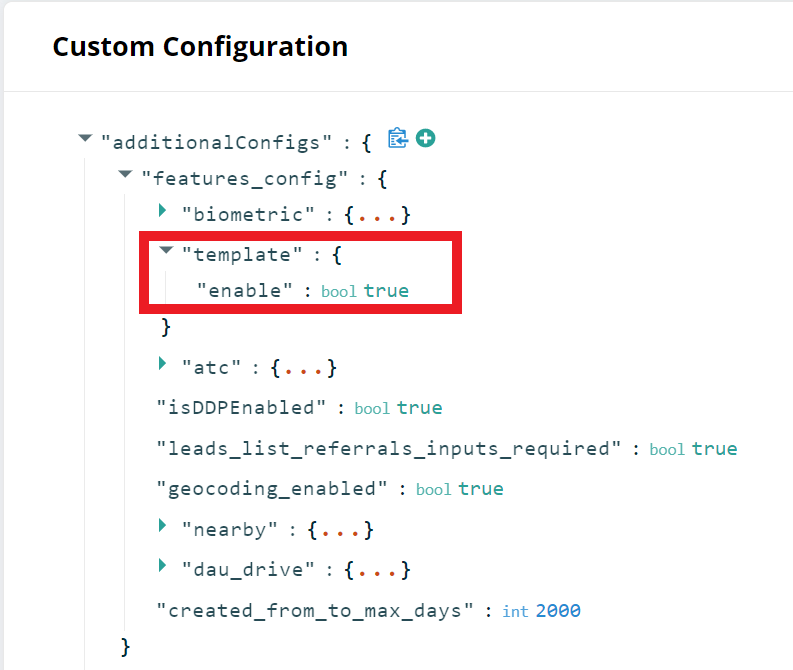
- Click Customize > Global Settings > Custom Configurations> additionalConfigs.
- Expand
additionalConfigsobject and clickfeaturesConfig>template. - To enable the
templatefeature, set the value totrueand to disable change it tofalse. - In the message box, click Go To Release Management so that you can move the changes permanently to the live configuration.
- Click Create a UAT release. Specify the release details and make sure to enter your own email ID because that's where you receive a one-time password (OTP) to continue with the process. Click Proceed.
- Enter the OTP you received in the email, and click Submit. Wait for a while till you see a confirmation message saying the process is complete.
- To see the changes, log out and log in again.
Configuring Message Center
Use the following steps to configure Message Center:
- Log in to Vymo web app.
- Click Customize > Global Settings > Dashboard Settings.
- Locate Message Center on the left panel.
- Enable access to Message Center on the dashboard and specify the order of display on the dashboard.
- Rename Message Center according to your company's preference in the Name field.
- In the message box, click Go To Release Management so that you can move the changes permanently to the live configuration.
- Click Create a UAT release. Specify the release details and make sure to enter your own email ID because that's where you receive a one-time password (OTP) to continue with the process. Click Proceed.
- Enter the OTP you received in the email, and click Submit. Wait for a while till you see a confirmation message saying the process is complete.
- To see the changes, log out and log in again.
Adding templates
- Log in to Vymo web app.
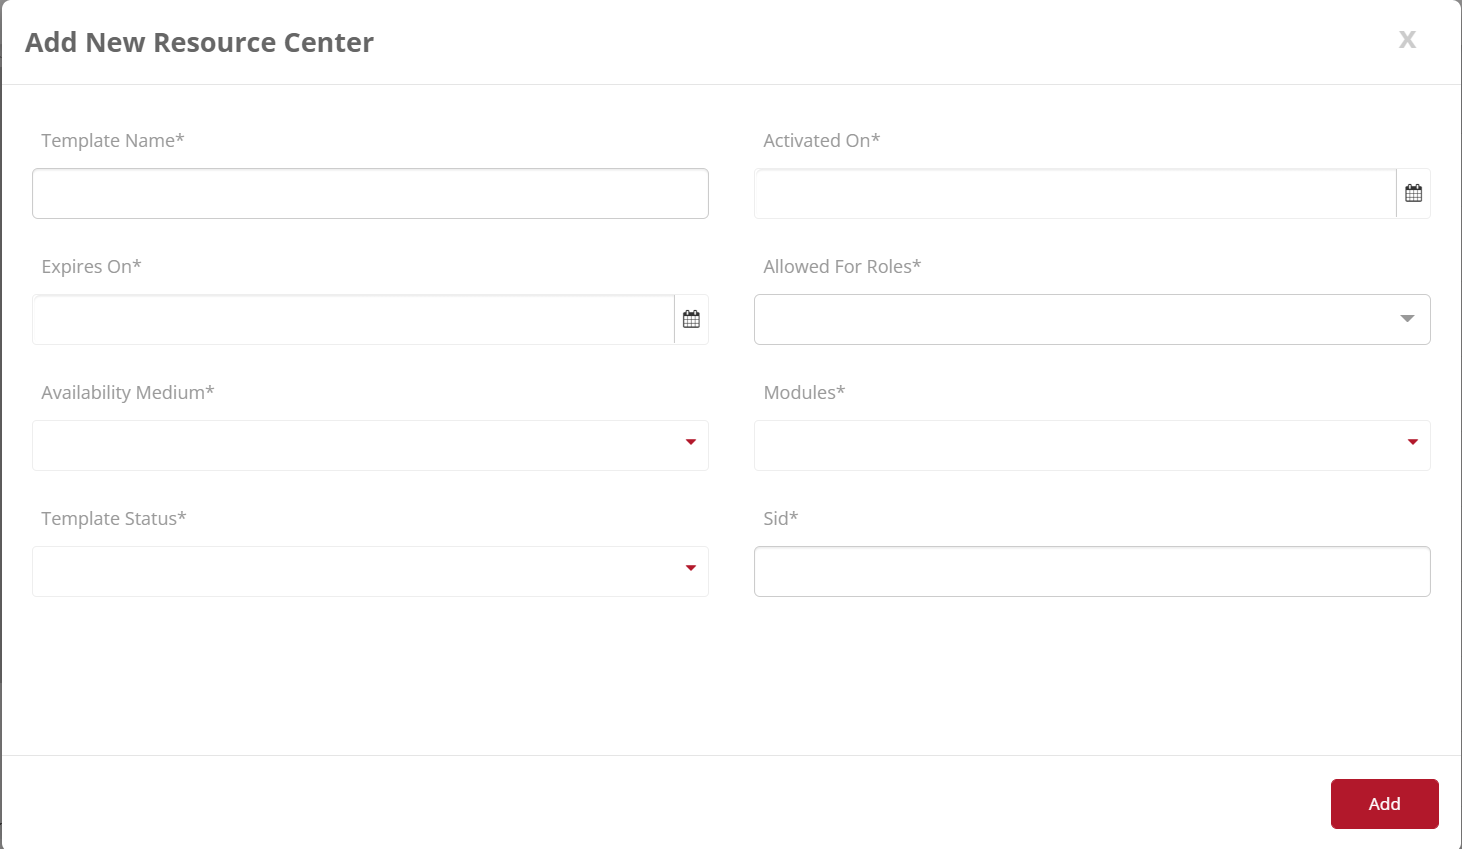
- Go to Message Center on the dashboard and click Add to add a template. View the following table for details about the fields in the Add page.
- Fill in the details and click Upload. To make sure template addition is successful, look into the lead or partner details page on the mobile app.
- Edit a template by clicking Edit, located on the right of each template.
| Field | Details |
|---|---|
| Template Name | Name of the template. |
| Activated On | The template activation date can differ from template creation date. You can schedule its activation according to your company's requirement. |
| Module | Select the module to which the template is visible. The next option (template) depends on the module chosen. |
| Template | Type the message template using different variables. Name, email address and phone number are examples of some variables. These variables change based on the receiver of the message. |
| Template Status | The template is visible on the Vymo app only if Publish is chosen. Draft, Submit, Approved, and Decommission are options that show the status of the template. |
| Sid | Sender ID (Sid) is the header of the message. This header is configured according to your company's preference. |