How to specify the role permissions for the lead modules
Introduction: In Vymo, roles play a significant part in user capabilities. An administrator, for instance, would naturally possess more functionalities than an agent. When working with the leads module, Vymo provides flexibility in designating distinct permissions for each role.
| Action | Platform(s) | Description |
|---|---|---|
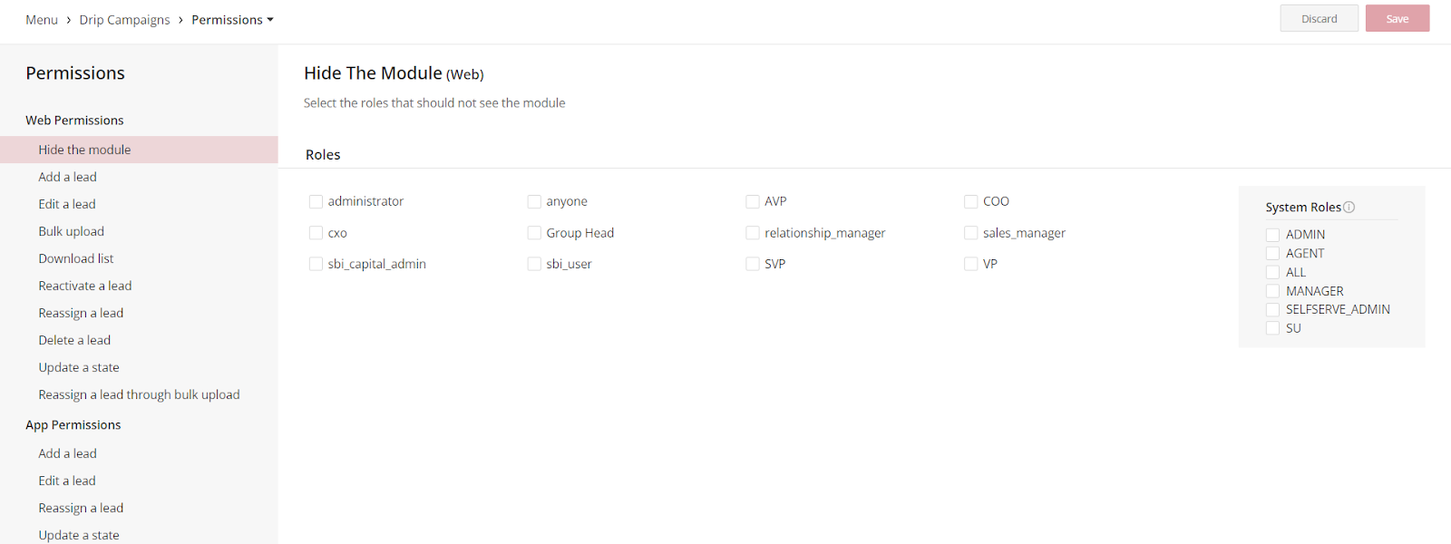
| Hide the Module | Web | Determine roles that should not view the module. |
| Add a Lead (Web) | Web | Specify roles permitted to create a lead. |
| Edit a Lead (Web) | Web | Allow roles to modify lead details. |
| Bulk Upload (Web) | Web | Designate roles that can upload multiple leads at once using a spreadsheet. |
| Download List (Web) | Web | Assign roles with the ability to download the entire lead list. |
| Reactivate a Lead (Web) | Web | Define roles that can reopen a closed lead, returning it to its pre-closure state. |
| Reassign a Lead (Web) | Web | Specify roles that can change the lead assignee. |
| Delete a Lead (Web) | Web | Allow roles to remove a lead from the system. |
| Update a State (Web) | Web | Choose roles that can manually transition a lead between states based on set rules. |
| Reassign a Lead Through Bulk Upload (Web) | Web | Select roles that can reassign multiple leads at once via spreadsheet containing lead/user details. |
| View Audit History | Web | Select the roles that can view the audit history. |
| Add a Lead (App) | App | Determine roles that can create a lead on the app. |
| Edit a Lead (App) | App | Assign roles that can alter lead details on the app. |
| Reassign a Lead (App) | App | Choose roles that can reassign a pre-allocated lead via the app. |
| Update a State (App) | App | Define roles that can manually change a lead's state on the app, typically based on certain rules. |
Prerequisites: Ensure that the role you intend to configure permissions for is already set up.
Step-by-step Guide:
- Access Vymo:
- Login to the Vymo web app.
-
Click on the gear icon located in the upper-right corner.
-
Enter Module Settings:
-
Within the "Module Settings" section, choose the module where you intend to define role-based permissions.
-
Permission Settings:
-
Click on "Permissions."
-
Assign Permissions:
- For each of the actions mentioned, select the roles authorized for these actions. If no roles are selected for a particular action, that feature will be omitted from the app's view.
-
Detailed guidance is provided for each action. Hover over the info icon next to each action to gain insights.
-
Save & Deploy:
- Once you've made the necessary adjustments, click "Save" found at the top-right corner.
- Conclusively, release the changes to implement them.
See also
- Roles Configuration