How to specify the role permissions for user accounts
Roles determine what you, as a user, can see or do on Vymo. So, for example, if you're an administrator, you can have more menu options and be able to do many more actions than a person with the role of an agent. You can specify these options and permissions differently for each role.
User permissions

Module permissions

Record permissions
Configuration options
| Permission | What happens when it's enabled |
|---|---|
| Add a user account | The person sees an Add option on the modules list screens |
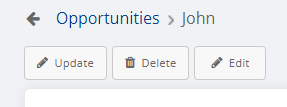
| Edit a user account | The person sees an Edit option on the record details screen |
| Change the manager for a user account | The person sees a Change Manager option on the user details screen |
| Bulk upload user accounts | The person sees an Upload option on the modules list screen |
| Export the users list | The person sees a Download option on the user list screen |
| Unlock a locked user account | The person sees an Unlock User Account option on the user list screen |
| Enable a locked user account | The person sees an Enable User Account option on the user list screen |
| Disable a locked user account | The person sees a Disable User Account option on the user list screen |
Dependencies
- The role must exist. See Configure custom roles.
How to
- Log in to the Vymo web app and click the gear icon :octicons-gear-16: in the upper-right corner of the screen.
- In the User Management section, click Permissions.
-
For each of the actions that are listed, select the roles that can do those actions. If you don't select any role for a specific action, that option is be displayed on the app screens.
Tip
Each of these actions has on-screen guidance to help you along. Move the cursor over the information icon to read the details.
-
When done, click Save near the top right. Then, release the changes.