Go to Module Settings > select the Desired Module > click on Data Import.
Add Fields
Adding Process
Click on Add Field.
Choose the desired field from the dropdown menu. Details of the selected field will be displayed.
Click Add. Repeat this step for all required fields.
Upload Record Configuration
Unique ID Specification
Determine which of the added fields will serve as the unique ID for records during the upload process.
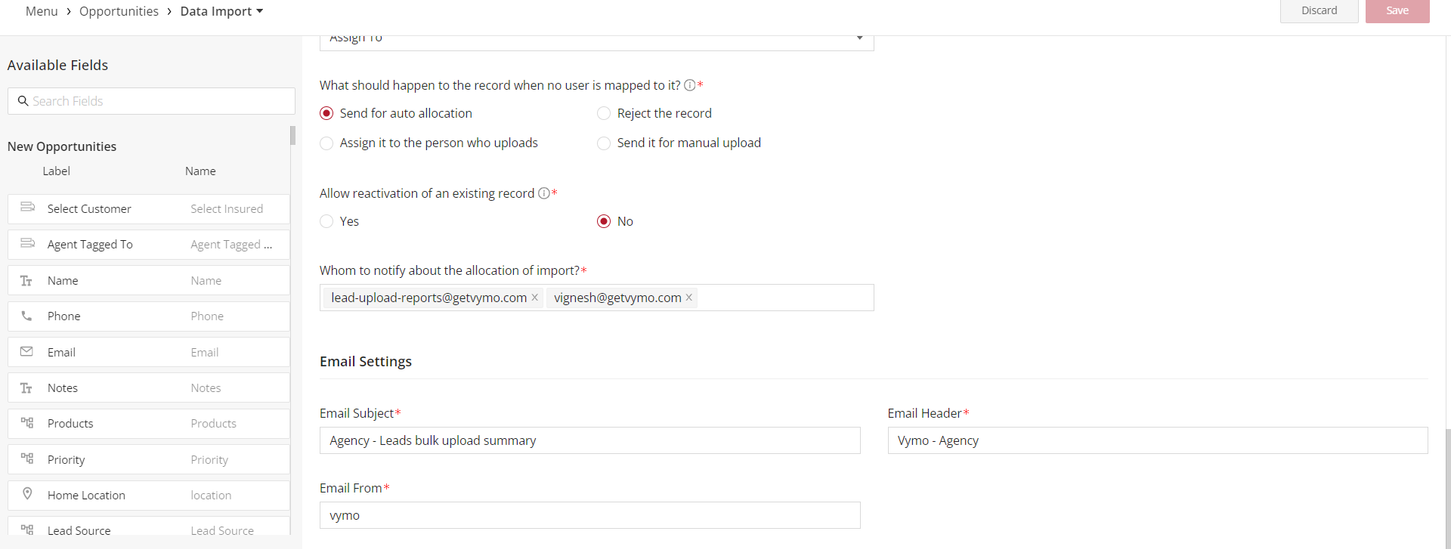
Mapping & Notifications
Configuration
Define the course of action when there's no person mapped to the uploaded lead or partner via Import Template Settings.
Designate the recipient(s) for notifications about the upload jobs and tailor the content of these emails.
Commit Your Changes
Saving Configurations
Once satisfied with your configurations, click Save.
In the subsequent prompt, select Go To Release Management to cement your changes into the live configuration.
Release Management
Process
Opt for Create a UAT Release.
Fill out the release details. Ensure your email address is included for OTP reception.
Click Proceed.
Input the OTP received via email, then click Submit. Await the confirmation message indicating completion.
Visualizing Changes
Observing the Impact
To observe the changes firsthand, log out of Vymo and then log back in.
The next time you initiate a bulk upload (Module Name > Module Name List > Bulk Upload), your specified fields will be integrated into a template file. This file can be downloaded, populated with data, and subsequently uploaded.