Enabling the Maps feature
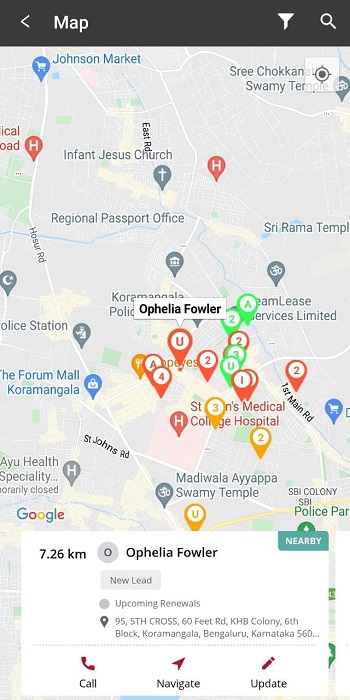
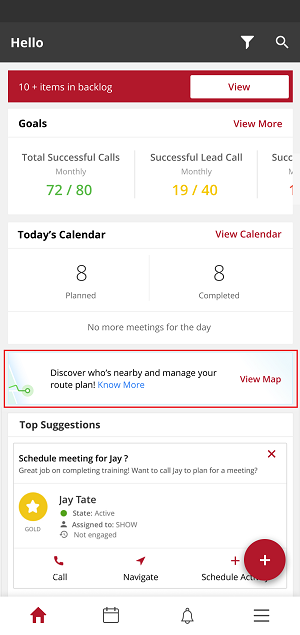
Manage your route plan and discover nearby leads or partners by using maps. Scheduling meetings and viewing lead or partner information are some of the other things that you can do with maps. Tap the card on the Hello screen of the phone app to view the map, a suggested route, and nearby pins. Nearby pins are leads and partners that are in your search radius.
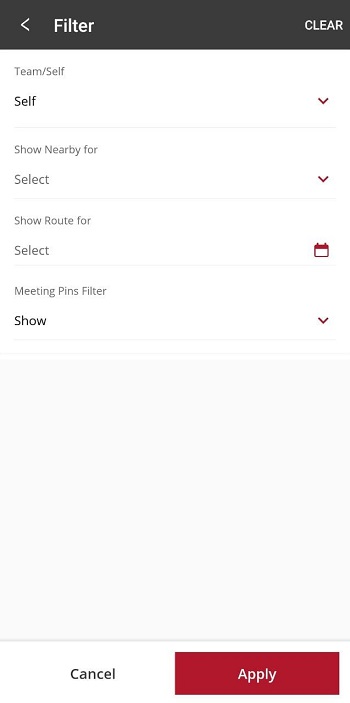
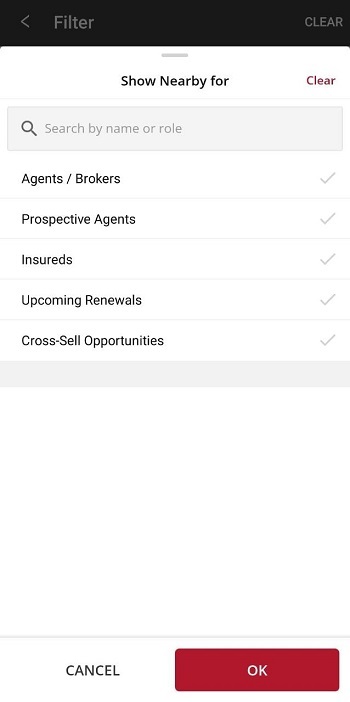
Use the filter option to narrow your search to a specific module and date. You can also schedule meetings for dates in the future as well.
To use maps, you must do the following tasks:
- Enable the Maps card on the Hello screen. See Enabling the Maps card on the Hello screen.
- Enable geocoding. See Setting up geocoding.
- If your company became a Vymo customer before 2019, also enable the
geofencefeature. See Enabling thegeofencefeature.
Enabling the Maps card on the Hello screen
Self serve
This procedure can be done only by a Vymo administrator.
To enable the Maps card on the Hello screen:
- Log in to the Vymo web app and click the gear icon :octicons-gear-16: in the upper-right corner of the screen.
- In User Management section, click JSON Configuration.
-
Locate Features and go to
calendarobject and clear the checkbox for Disabled. Or, set thehideMapsInCalendarflag tofalse, like this:{ "type": "calendar", "disabled": false, "order": null, "code": "calendar", "name": "Calendar", "hideMapsInCalendar": false, "showEndTimeInCalendarCard": false, "hideDurationInCalendarCard": false } -
Click Save. You see a message that the changes are now saved as a draft.
- In the message box, click Go To Release Management so that you can move the changes permanently to the live configuration.
- Click Create a UAT release. Specify the release details and make sure to enter your own email ID because that's where you receive a one-time password (OTP) to continue with the process. Click Proceed.
- Enter the OTP you received in the email, and click Submit. Wait for a while till you see a confirmation message saying the process is complete.
- To see the changes, log out and log in again.
Enabling the geofence feature
Self serve
This procedure can be done only by a Vymo administrator and is applicable for clients of Vymo before 2019. For new clients, geofence is disabled by default.
For the location of a lead or partner to be displayed on maps, you must enable the geofencefeature.
- Log in to Vymo web app.
- Click Customize > Global Settings > Custom Configurations> additionalConfigs.
- Expand the
additionalConfigsobject and clicklead_modules>geofence. - To enable the
geofencefeature, set the value totrue. To disable the feature, change the value tofalse. - In the message box, click Go To Release Management so that you can move the changes permanently to the live configuration.
- Click Create a UAT release. Specify the release details and make sure to enter your own email ID because that's where you receive a one-time password (OTP) to continue with the process. Click Proceed.
- Enter the OTP you received in the email, and click Submit. Wait for a while till you see a confirmation message saying the process is complete.
- To see the changes, log out and log in again.
Visual guides
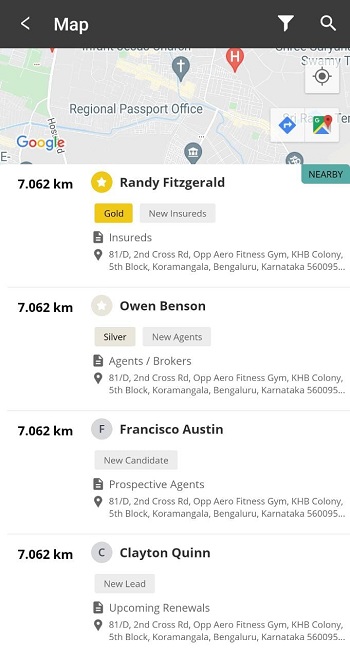
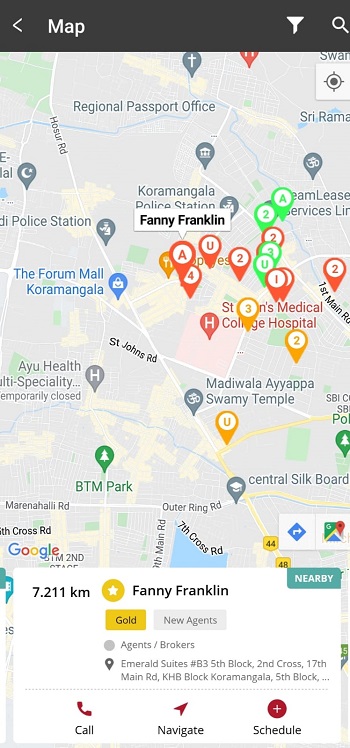
When you tap one of the meeting pins, you see a card that has details of that lead or partner. The card shows the distance (from the lead or partner), tier code, tier info and lead score. The following images show different cards and their characteristics.
Partner card
This card shows the tier and tier code (gold, silver, platinum) along with the distance.
Lead card