How to create activities
Activities are of two kinds:
- Those that are specific to a module, for example, calling up a lead. These activities are defined in specific leads or partners modules.
- Those that are generic in nature. For example, a team meeting of all agents at the beginning of the day. These activities are defined as user management options.
Configuration options
The available activity types are these:
- For modules, the available options are meeting, outgoing call, incoming call, reminder, web conference, email, LINE WORKS chat, and LINE WORKS chat disposition
- For generic activities, additionally, Office 365 calendar and Zoom
Each activity type has permissions that you can specify:
- The roles that can create the activity
- The roles that the activity can be assigned to
- The roles that can participate in the activity
Additionally, the following options are available for all activity types:
- Add participants after the activity is marked as complete
- Automatically close activities after a specified number of days
For a list of the configuration options, see Reference: Activities.
How to
- Log in to the Vymo web app and click the gear icon :octicons-gear-16: in the upper-right corner of the screen.
- Depending on the kind of activity you're creating:
- For module-level activities, in the Module Settings section, click the module for which the activities are to be defined. Then, click Activity Management.
- For generic activities, in the User Management section, click Activity Management.
- On the menu at the left, click Add and select Activity.
- Select the Enable option. Enter a name for the activity, and select the type.
- Click inside the Choose the roles the activity is allowed for box, and select the roles.
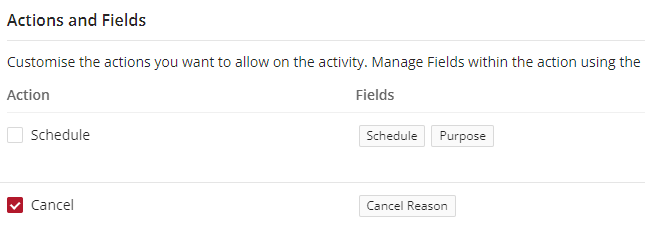
-
Specify the actions that are allowed for the activity. For each action you select, click Manage Fields, and drag the fields to be shown on the input form when a person is creating or updating the activity. Then use the Return to Activity Management option to return to the Activities page.
-
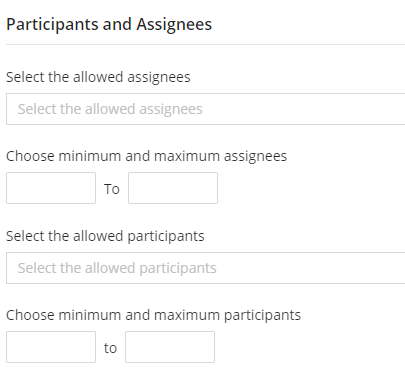
Specify the roles that the activity can be assigned to, and the number of assignees.
- Specify the roles that can participate in the activity, and the number of participants.
- Specify the other options. When done, click Save near the top right. Then, release the changes.
Visual guides
Creating an activity