Geo Verified Attendance User Guide (Self-Serve)
Configuration Guide
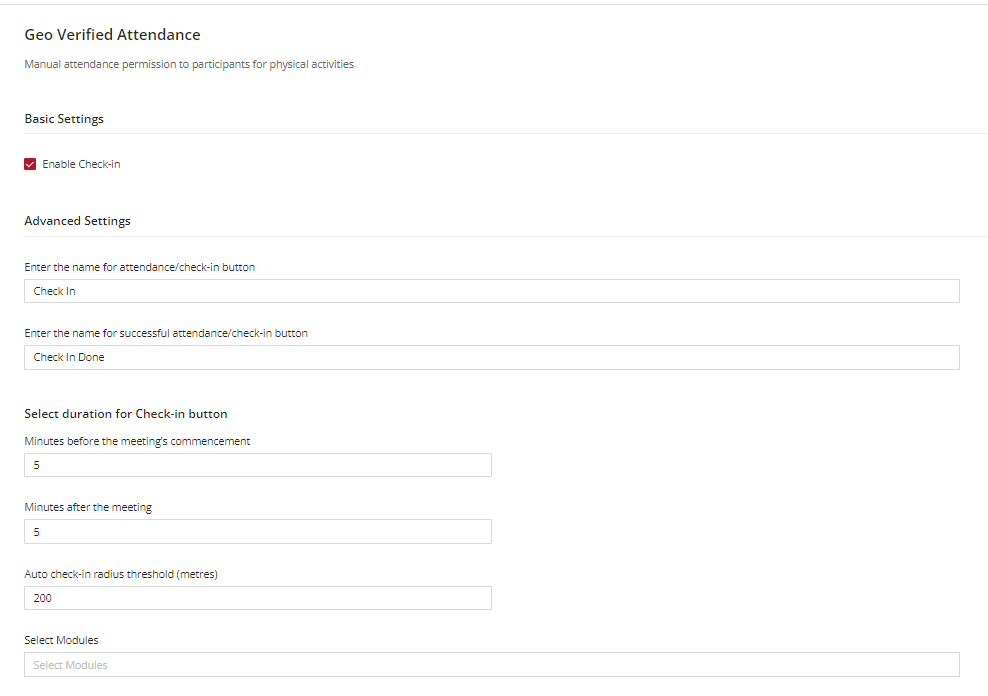
Enabling Geo Verified Attendance Functionality
- Log In: Access the Vymo web app with your credentials.
- Navigate: Go to the 'Global Settings' section and select 'Feature Management'.
- Feature Activation: Find 'Geo Verified Attendance' and check the box for 'Enable Check-in' to activate the feature.
Setting Up Advanced Settings
Customize Button Labels:
- Define the label for the attendance/check-in button, such as "Check In".
- Specify the label for successful attendance/check-in, e.g., "Check In Done".
Buffer Time Configuration:
- Set a duration before the meeting's commencement, like 5 minutes when check-in is possible.
- Determine a duration after the meeting's end, also 5 minutes, for late check-ins.
Geo-Radius Threshold:
- Establish an auto check-in radius, such as 200 meters, to validate presence at the meeting location. It is recommended not to reduce the radius below 200 meters for better results.
Module Selection:
- Choose applicable modules or activities for which the check-in feature should be available by clicking 'Select Modules'.
Saving and Releasing Changes
After configuring the settings, make sure to save your changes.
Release the updated settings to make them live for end-users.
User Guide
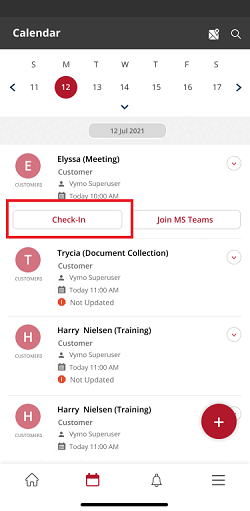
Using Geo Verified Attendance
Mobile App Check-In:
- Open the Vymo mobile app when you arrive at or near the meeting location.
- Tap the 'Check In' button to mark your attendance.
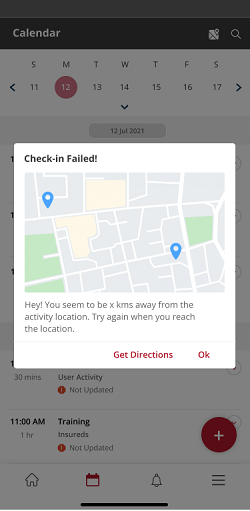
Successful Check-In:
- Upon successful check-in, your attendance is automatically logged, and the button will indicate "Check In Done".
Failed Check-In:
- If you're outside the pre-defined radius, the app will prompt you to move closer to the meeting location to check in successfully.
See also
- Feature Management