Preventing screenshots (Android only)
You can prevent your team from taking app screenshots. For companies where data security is a top concern, doing so helps protect the data and comply with the company's data security policies.
You can save an image of what's there on your phone screen by pressing the buttons in a specific order. For example, in some Android versions, if you press the Power and Volume buttons simultaneously for 1 second and release them, an image of the screen is saved in the photo gallery.
But, sometimes, the screens can contain personally identifiable information (PII), such as tax number, which you wouldn't want to be misused.
You can configure the Vymo app to prevent people from taking screenshots when they're using the app. The setting works for only Android devices and, if enabled, displays the following message when someone tries to take a screenshot: Unable to capture screenshot. Prevented by security policy.
Setting up the partial screenshot feature
You can disable screenshots for specific modules and for specific reports.
Reports need code changes
You can use self serve for enabling or disabling screenshots. You can't use self serve to create reports for this feature.
Here's how the feature works at the module and global levels.
| Configuration | Flag | Effect |
|---|---|---|
| Global settings | disabled: true |
Screenshots are disabled throughout the app |
| Global settings | disabled: false |
Screenshots are enabled throughout the app |
| Module settings | In global settings, disabled: false and in module settings, screenshots are enabled |
Screenshots are disabled for the module |
| Global settings | disabled: true |
Screenshots of activity screens are disabled throughout the app |
Disabling screenshots throughout the app
The default setting for this feature is disabled: false, which means screenshots are enabled throughout the app. To disable screenshots throughout the app, change this flag to true.
- Log in to the Vymo web app.
- Click Customize > Global Settings > JSON Configurations.
- Locate the
featuresobject and, towards the right of the screen, select Collapse level:3. -
Find the array for
screenshots, and set thedisabledflag totrue.{ "type": "generic", "disabled": true, "order": null, "code": "screenshots", "name": "Screen Shots", "properties": {} } -
Click Save. You see a message that the changes are now saved as draft.
- In the message box, click Go To Release Management so that you can move the changes permanently to the live configuration.
- Click Create a UAT release. Specify the release details and make sure to enter your own email ID because that's where you receive a one-time password (OTP) to continue with the process. Click Proceed.
- Enter the OTP you received in the email, and click Submit. Wait for a while till you see a confirmation message saying the process is complete.
- To see the changes, log out and log in again.
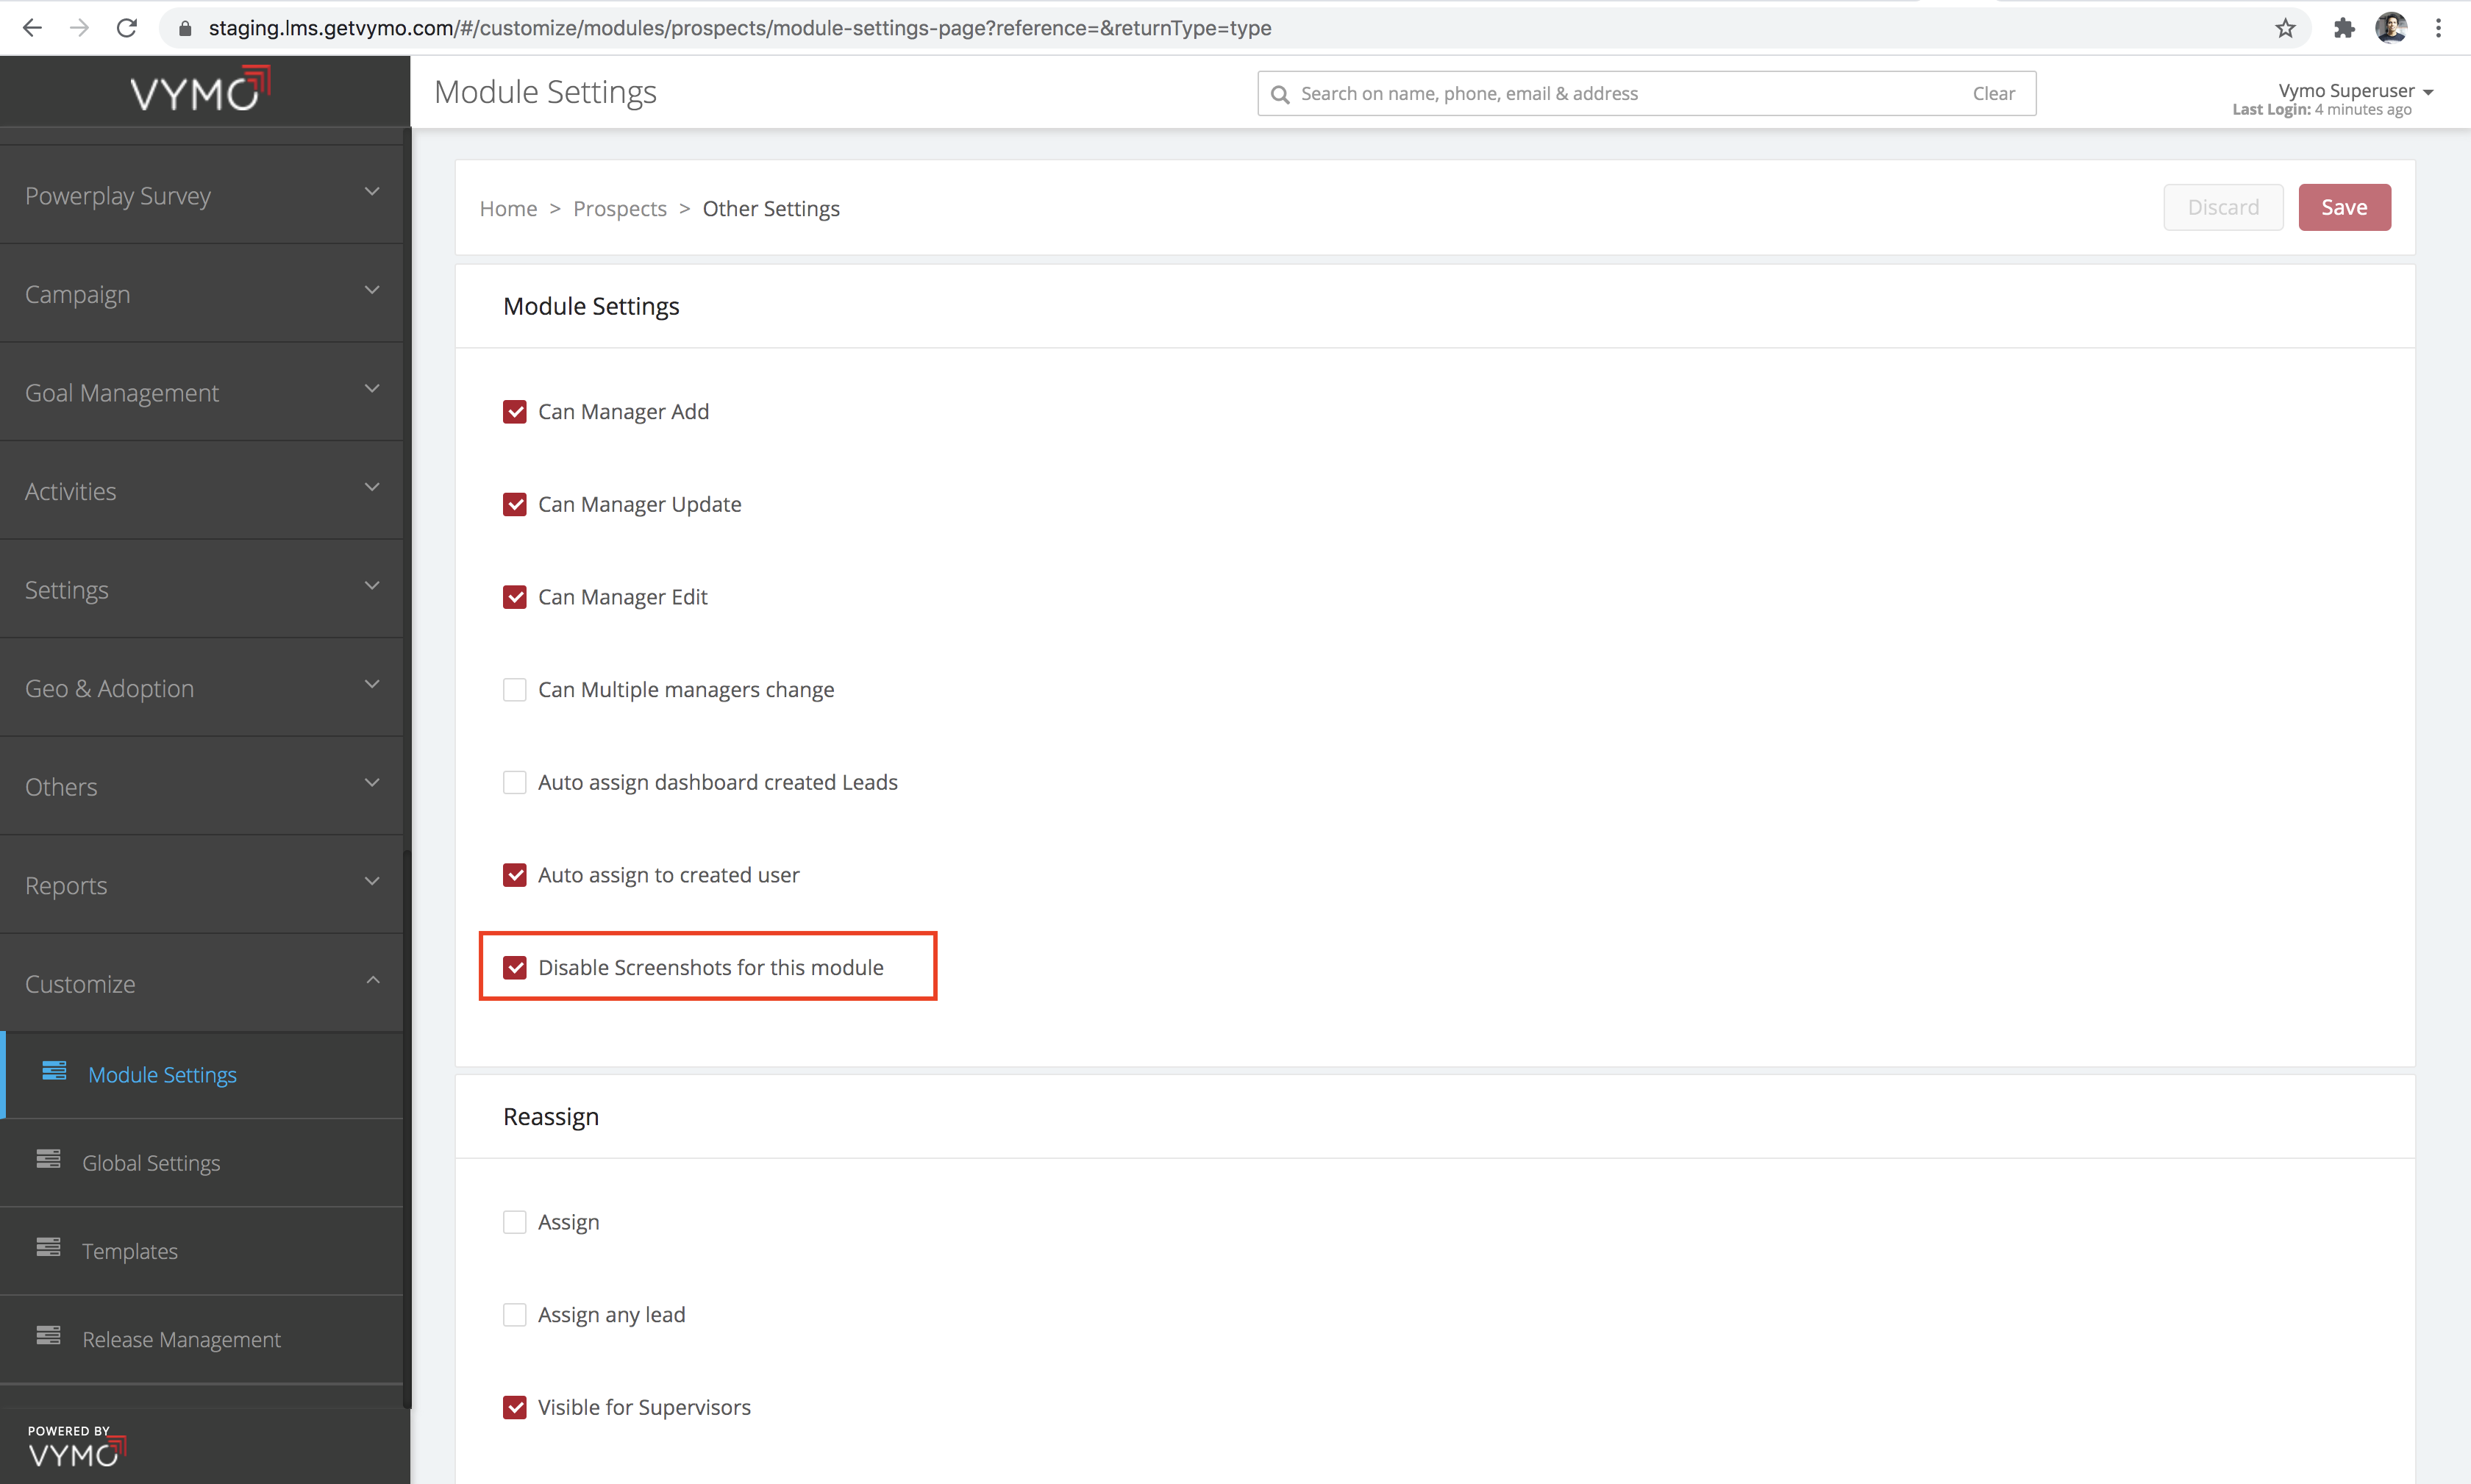
Disabling screenshots for a specific module
- Log in to the Vymo web app.
- Make sure that the global settings for this feature is set to
disabled: false. See Enabling screenshots throughout the app. - Click Customize > Module Settings. Click the pencil icon :material-lead-pencil: of the module where you want to disable screenshots.
- Under Settings click on Other Settings.
- Click the checkbox for Disable screenshots for this module.
- Click Save. You see a message that the changes are now saved as draft.
- In the message box, click Go To Release Management so that you can move the changes permanently to the live configuration.
- Click Create a UAT release. Specify the release details and make sure to enter your own email ID because that's where you receive a one-time password (OTP) to continue with the process. Click Proceed.
- Enter the OTP you received in the email, and click Submit. Wait for a while till you see a confirmation message saying the process is complete.
- To see the changes, log out and log in again.
Disabling screenshots for activities
Disable screenshots for activity details, list view, activity backlogs, and calendar list view. The default setting for this feature is disabled: false. To disable screenshots for screens that show activity details, change this flag to true.
- Log in to the Vymo web app.
- Click Customize > Global Settings > JSON Configurations.
- Locate the
featuresobject and, towards the right of the screen, select Collapse level:3. -
Find the array for
screenshots, and set thedisabledflag totrue.{ "type": "generic", "disabled": true, "order": null, "code": "activity_screenshots", "name": "Activity Screen Shots", "properties": {} } -
Click Save. You see a message that the changes are now saved as draft.
- In the message box, click Go To Release Management so that you can move the changes permanently to the live configuration.
- Click Create a UAT release. Specify the release details and make sure to enter your own email ID because that's where you receive a one-time password (OTP) to continue with the process. Click Proceed.
- Enter the OTP you received in the email, and click Submit. Wait for a while till you see a confirmation message saying the process is complete.
- To see the changes, log out and log in again.