How to Configure Lead Allocation Rules
Introduction
Lead allocation rules are instrumental in the automated assignment of leads to sales representatives. These rules systematically assign incoming leads to sales reps based on predefined criteria, leaving leads that don't match any rule open for manual assignment.
Dependencies
If your module uses custom address fields, activating geocoding becomes essential. Refer to "Setting up Geocoding" for detailed guidance.
User Guide
- Navigate to Module Settings: On the homepage, choose "Self Serve", then proceed to "Module Settings".
- Choose Desired Lead Module: Select the specific lead module for which you wish to set allocation rules.
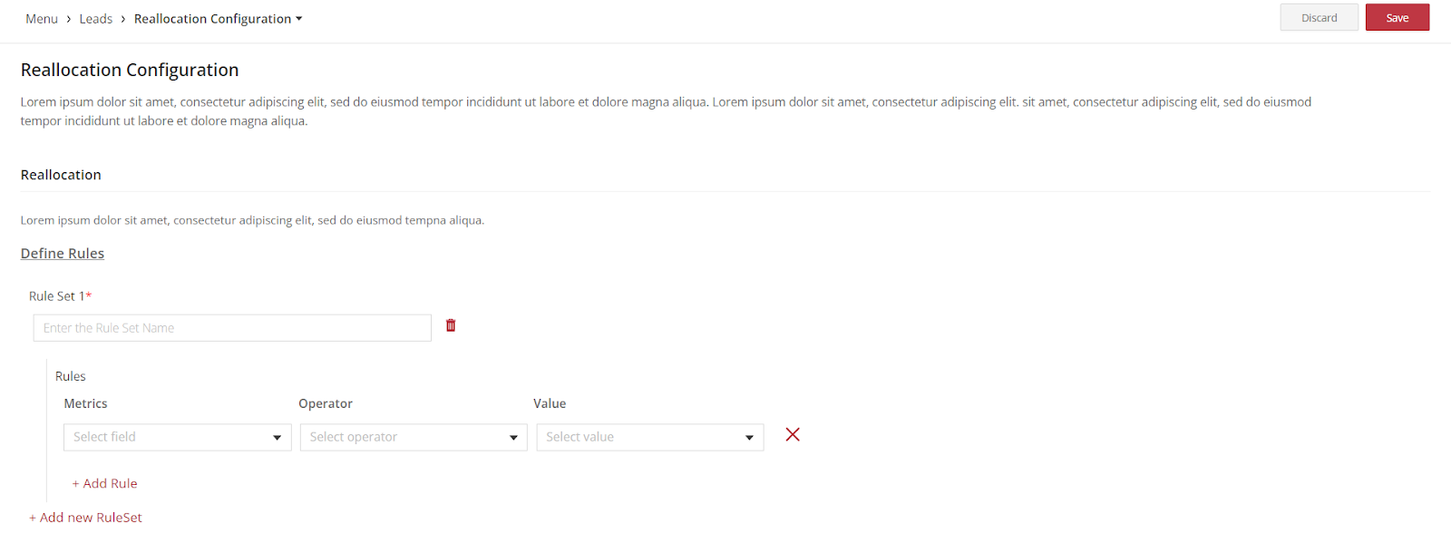
- Access Reallocation Configuration: Navigate to "Reallocation Configuration".
- Define Rule Sets: Lay out a rule by picking a parameter, deciding on the evaluation condition, and designating the value for comparison.
- Sequence & Logic: Craft as many rules and rule sets as necessary. The sequence dictates their execution order. Rule sets follow an IF-ELSE logic, while rules within a set follow an AND logic.

- Save & Execute: Click "Save" at the top right. Opt for "Go To Release Management" to solidify these changes.
- UAT Release: Click on "Create a UAT release", fill in the details, ensuring to use your email for OTP reception, and press "Proceed".
- OTP Verification: Enter the received OTP and hit "Submit". Await confirmation.
- Refresh & View: Log out and then back into the platform to see the rules in action.
Note
Your changes are initially in draft format. Release these updates to activate them. Once released, these settings activate upon the next app login or during its next update.
See also
- Lead Lifecycle
- Lead Lifecycle Overview
- How to create a leads module from a template
- How to create lead states
- How to add tags to lead states
- How to create transitions for lead states
- How to configure the state fields for leads
- How to enable or disable lead states
- How to enable or disable lead reassignment
- How to reactivate closed leads
- How to configure lead allocation rules
- How to specify the role permissions for the lead modules
- How to configure the lead reactivation behavior