Enabling goals
Activating the goals feature is a prerequisite to harnessing its full potential within your organization. This guide will navigate you through the process of enabling goals in the Vymo app.
Initial Setup
To initiate goal setting, the feature must be activated via the self-serve interface.
Activating Goals
Here’s how to enable the goals feature:
Access the Platform:
- Sign in to the Vymo web application.
Navigate to Goal Configuration:
- Proceed to
Self-Serve > Global Settings > Performance Management > Goal Configurations.
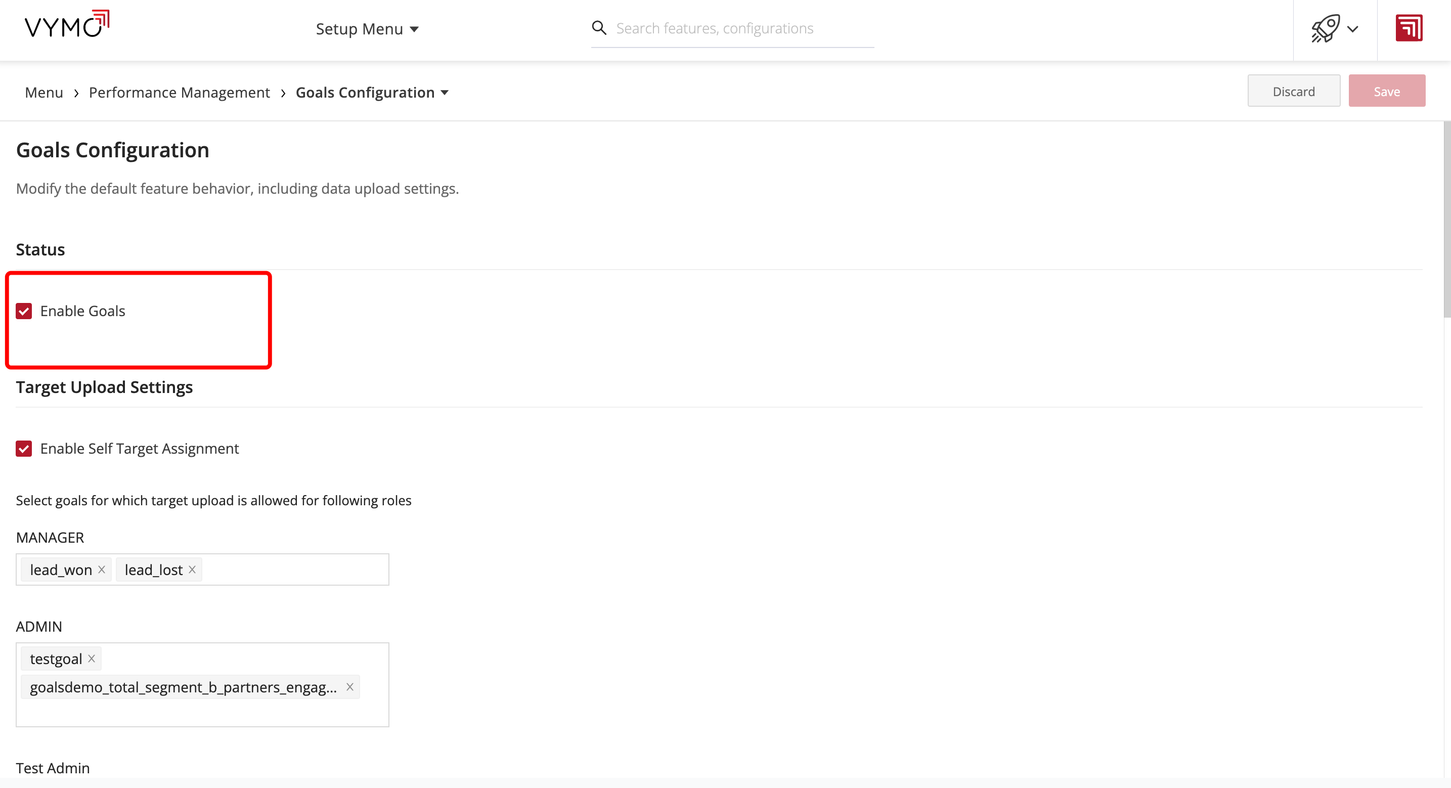
Enable Goals:
- Check the Enable Goals option. The other settings on the page can be disregarded at this stage.
Save Draft:
- Click Save. A notification will appear, indicating that the changes are saved as a draft.
Release Management:
- In the notification message, select Go To Release Management to cement the changes into the live environment.
Create a Release:
- Opt for Create a UAT release. Fill in the details of the release, ensuring your email address is accurate to receive the one-time password (OTP).
Verification:
- Upon receipt of the OTP in your email, enter it and select Submit. Await the confirmation message which verifies the completion of the process.
Finalizing Changes:
- To view the changes, sign out of the app and then sign back in.
Post-Activation
With the goals feature now active, you can proceed to define and customize the goals pertinent to your team's objectives and performance indicators.
The goals are now ready to be defined. See Creating goal definitions.
See also
- Goals Overview
- Enabling Goals
- Setting Up Goals
- Setting Up Computed Goals
- Creating Goal Filters
- Creating User Score Goal
- Partner Goal Setting (Business Metrics)
- Goals Grouping
- Assigning Targets to People
- Uploading External Achievements