Calls overview
Your calls to leads and partners are detected automatically. Only those calls that are made to leads and partners through the app are detected by the app, not the other calls that you make through your phone. For every call, whether they go through or don't, you're prompted with suggested actions as soon as the call ends.
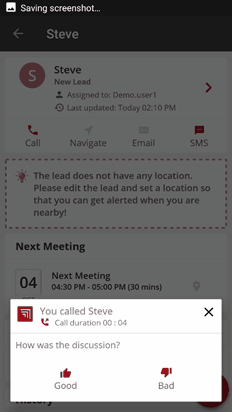
The actions that are suggested for calls can be configured to suit your requirements. For missed calls, you can call back. For outgoing calls, depending on whether the outcome was good or not so good, you're prompted with the next actions to update the state of the lead, such as schedule a follow up or drop the lead.
Calls can't be made if you're offline or not logged into the app.
Cloud telephony
You can choose to make calls in the app by using a cloud telephony solution (where the call is made through a cloud server). So, you make calls by using the voice-over-internet protocol (VoIP) through a platform such as Exotel. When you opt for cloud telephony with Vymo, your calls can be made through both the mobile app and the web app.
The following table shows the differences between standard calls (where a call is made directly through your phone) and cloud telephony.
| Standard calls | Cloud telephony | |
|---|---|---|
| Device | Phone | Phone, laptop |
| Call recordings | No | Yes |
| Call disposition | Yes | Yes |
| Integration with your cloud telephony system | No | Yes |
If cloud telephony is configured for you, when you tap the call icon :material-phone: on a lead or partner screen, the following things happen:
- You receive a call from the cloud telephony server.
- After you answer the call, the server places a call to the lead or partner.
- If the lead or partner answers the server call, both of you are connected to each other.
After the connection is established for both of you, you can speak and listen just like you do on a standard call. After you complete the call, the following things happen:
- The activity is logged. You can refresh the screen and see it in Completed Activities.
- The call recording URL is added to the activity details. You can click the URL and listen to the recording. If you don't see a recording URL, contact your Vymo administrator.
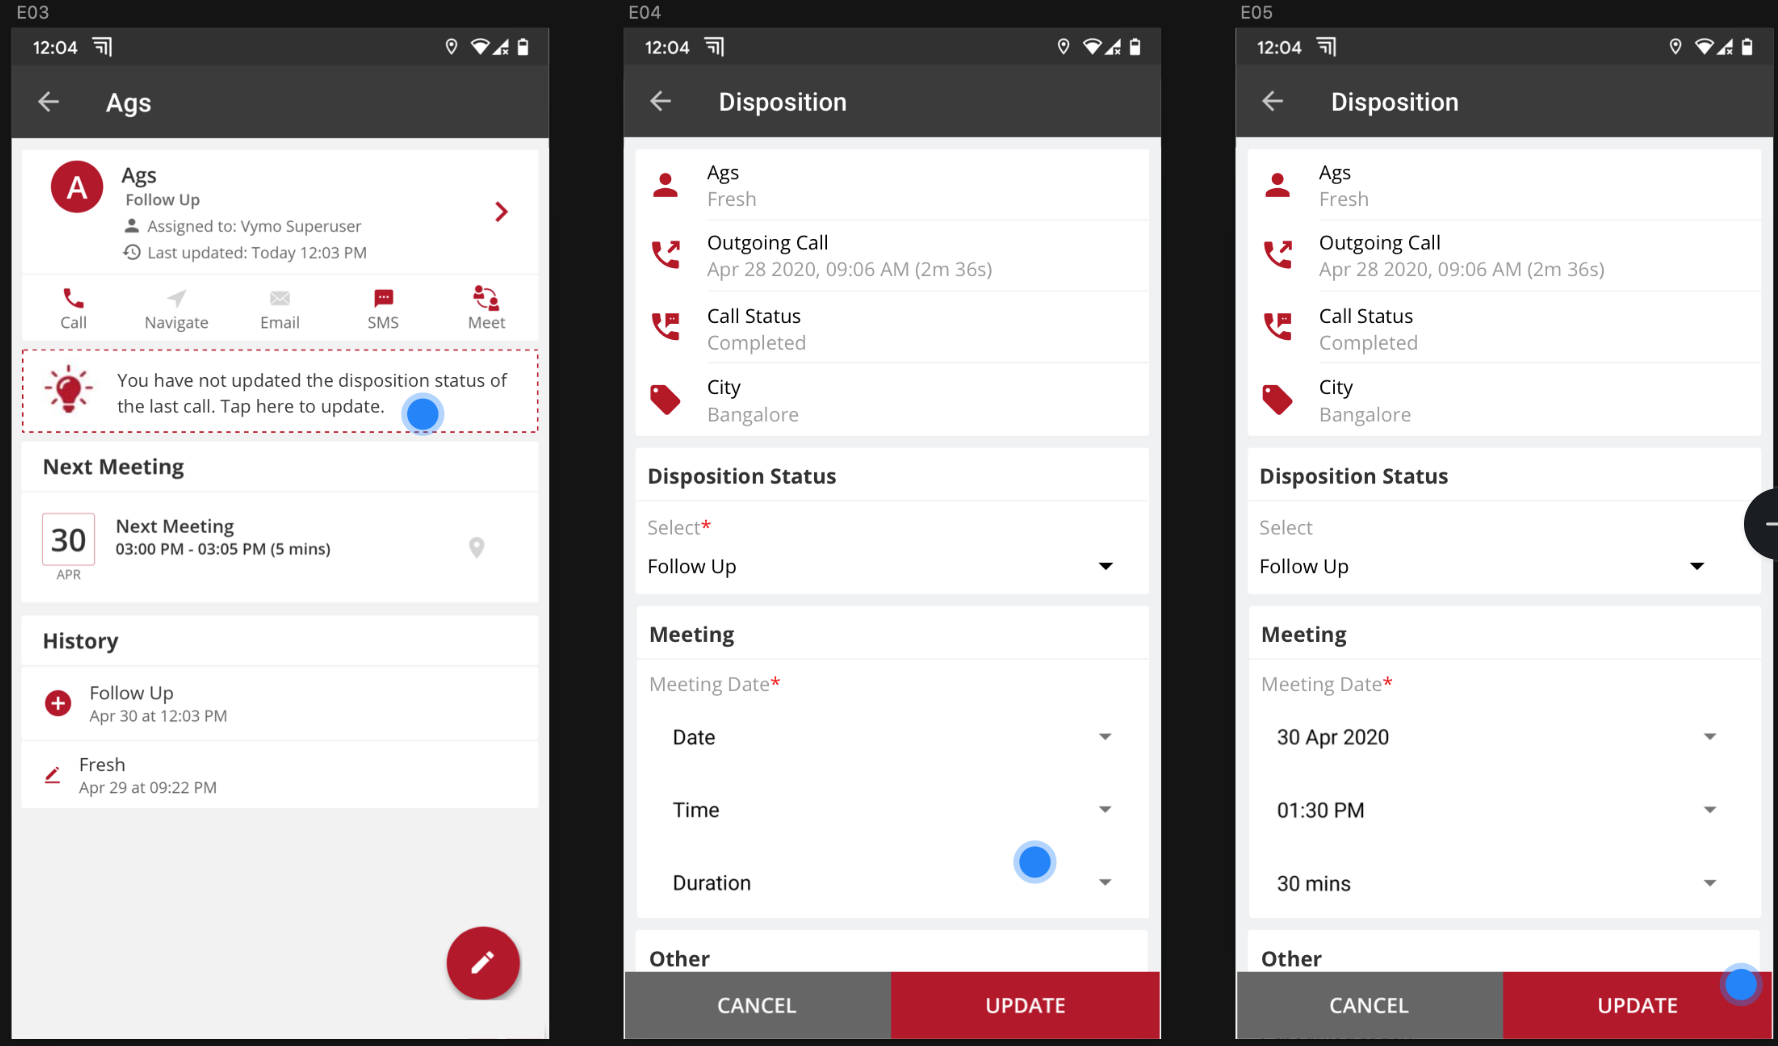
- If call dispositions are configured for your company, you're prompted to log the outcome of the call. Enter the required information and tap Update.
If a connection can't be established, or if the person you're calling rejects the call, you can try calling again.
While you're on a call, you can't see the phone number that you're calling. However, the phone number is always visible on the details screen of the lead or partner. Remember, though, that your company can choose to mask this number from you.
Enabling cloud telephony
- Log in to the web app.
- Click Customize > Global Settings > JSON Configurations.
- Locate the
featuresobject, expand it, and look for the object that contains thecall_handlingparameters. -
Set the value of the
enableClickToCallparameter totrue.{ "type": "call_handling", "disabled": false, "order": null, "code": "call_handling", "name": "Call Handling", "maxPendingIntervalMillis": 30000, "callDisposition": null, "enableClickToCall": true, "outcomeEnabled": true, "businessMeet": true, "enableTwilio": false, "twilio": null, "detectCall": false, "minimumCallDuration": 0, "stateUpdateMandatory": false }, -
Click Save. You see a message that the changes are now saved as a draft.
- In the message box, click Go To Release Management so that you can move the changes permanently to the live configuration.
- Click Create a UAT release. Specify the release details and make sure to enter your own email ID because that's where you receive a one-time password (OTP) to continue with the process. Click Proceed.
- Enter the OTP you received in the email, and click Submit. Wait for a while till you see a confirmation message saying the process is complete.
- To see the changes, log out and log in again.
Enabling call dispositions
- Log in to the web app.
- Click Customize > Global Settings > JSON Configurations.
- Locate the
featuresobject, expand it, and look for the object that contains thecall_handlingparameters. -
Set the flag for
callDispositiontotrue. BecausecallDispositionis an object (and not just a parameter), take care to add the entire code block that's highlighted in the following snippet. (For an explanation of the other parameters too, see Thecall_handlingobject.){ "type": "call_handling", "disabled": false, "order": null, "code": "call_handling", "name": "Call Handling", "maxPendingIntervalMillis": 30000, "callDisposition": { "enabled": true }, "enableClickToCall": true, "outcomeEnabled": true, "businessMeet": true, "enableTwilio": false, "twilio": null, "detectCall": false, "minimumCallDuration": 0, "stateUpdateMandatory": false }, -
Click Save. You see a message that the changes are now saved as a draft.
- In the message box, click Go To Release Management so that you can move the changes permanently to the live configuration.
- Click Create a UAT release. Specify the release details and make sure to enter your own email ID because that's where you receive a one-time password (OTP) to continue with the process. Click Proceed.
- Enter the OTP you received in the email, and click Submit. Wait for a while till you see a confirmation message saying the process is complete.
- To see the changes, log out and log in again.
Call recordings
When cloud telephony is enabled, you also get recordings of calls (for limits on call records, see Usage limits.) You can choose to make recordings available to everyone, or restrict their availability to only administrators.
To listen to the recordings:
- On a mobile device:
- Log in to the mobile app.
- Click the call activity that was recorded when the call was made.
- On the activity details screen, tap the recording URL and listen to the recording.
- On a computer:
- Log in to the web app.
- Click Activities > Activity List.
- Filter the list with the activity type as
Outgoing Call. - Click a record, scroll down to the Profile section, and click the recording URL.The audio file opens in another tab.
- Click Play and listen to the recording.
Some questions and answers
- While placing a call from the mobile app, I get this error:
Invalid Call Parameters: Invalid 'URL' or Invalid 'To' specifiedWhat does this mean? - It means that the number you're trying to call isn't a valid phone number.
- Is the conversation duration the same as the difference between the call start and end time?
- No. The call start time is marked from the time you receive the call from the server (and before the other person has responded). However, the conversation duration is calculated from the time when the other person picks up the call. Hence, the conversation duration is always shorter than the time difference between the call start and end time.