Assigning targets to people
To assign targets effectively, the Vymo app provides a bulk upload feature, ensuring individuals and teams have specific goals to achieve.
Team vs. Individual Targets:
- Team Target: A collective achievement measure for a manager's reporting hierarchy, including the manager's own contributions.
- Individual Target: Reflects the accomplishments solely of one person.
Prerequisites:
- Permission to Upload: Confirm your role is authorized to upload target data.
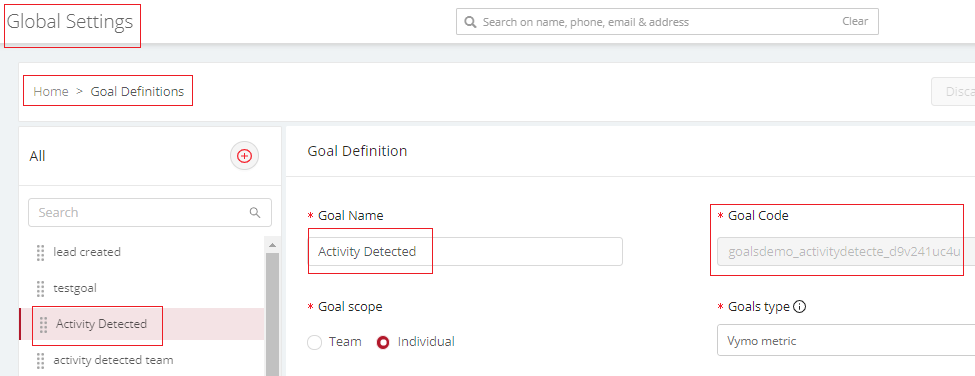
- Essential Codes: Obtain goal codes and user IDs from the Vymo administrator or through the platform's self-serve settings.
Downloading and Preparing the Template:
- Log in to the Vymo web app.
- Navigate to Goals Bulk Upload then click Goals Upload and download the template.
- Save the file in .csv or .xlsx format without altering the dates in Excel to prevent format issues.
Specifying Target Upload Permissions:
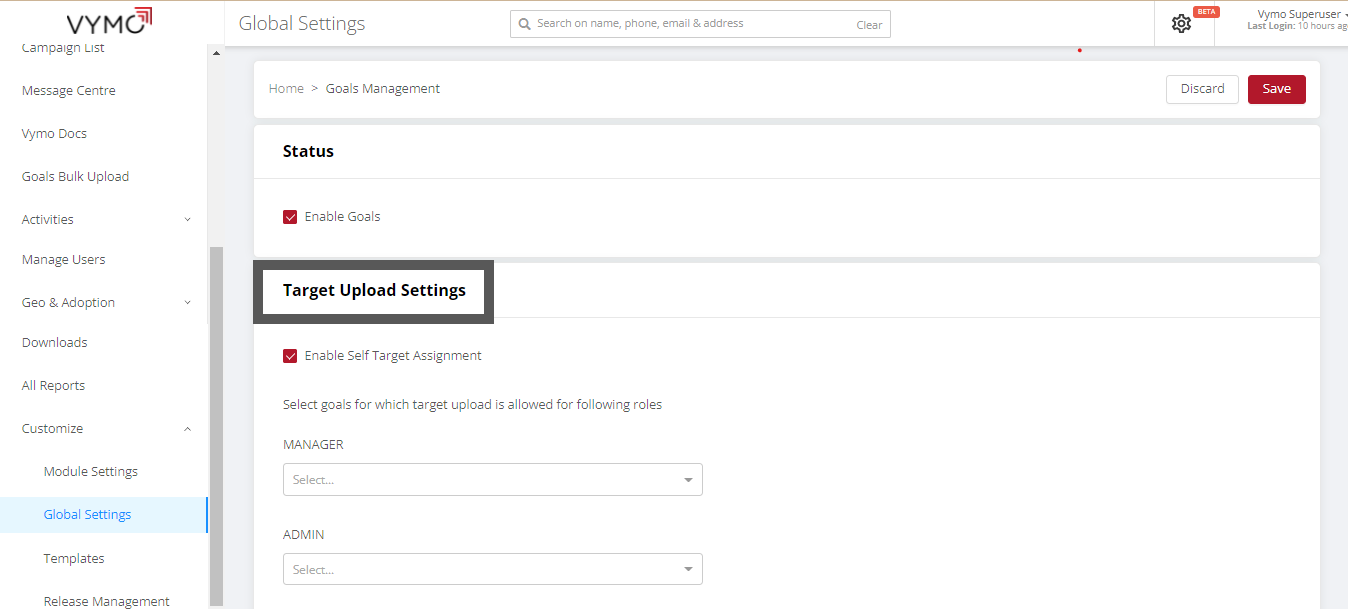
- Access the self-serve section in the Vymo web app.
- Enable the 'Self Target Assignment' checkbox to permit the self-upload of targets.
- Select the goals applicable to each configured role for the target assignment.
Finalizing the Upload:
- Release Management: Transition draft changes to live configuration.
- UAT Release: Create and verify using OTP.
- Confirmation: Await the message confirming a successful process completion.
- Re-login: Refresh your session to apply and view the updates.
Note:
- File Handling: For .csv files, use Google Drive to maintain formatting.
- Role Configuration: Goal mapping is contingent on having predefined roles within the system.
Outcome:
Upon completion, roles with the requisite permissions can assign targets, enabling a structured and measurable approach to tracking achievements within the Vymo app.
Uploading Targets: Step-by-Step Guide
Step 1: Preparing the Template
- ID Column: Ensure each row is numbered sequentially (e.g., 1, 2, ...).
- User ID: This column must be filled as it's crucial for the assignment process. For multiple targets per person, replicate the user ID for each target.
- User Name: Optional but recommended for clarity.
- Goal Code and Name: Must match existing goal definitions.
- Frequency Type: Choose only one from Daily, Weekly, Monthly, Quarterly, or Yearly.
- Start and End Dates: Use the format YYYY-MM-DD, and align start dates with the frequency (e.g., 1st of the month for monthly goals).
- End Date: Should be exactly one period after the start date (e.g., next month's same date for monthly goals).
- Goal Value: Enter as an integer.
- Status: Should be 'Enabled'.
- File Format: Save as either .csv or .xlsx.

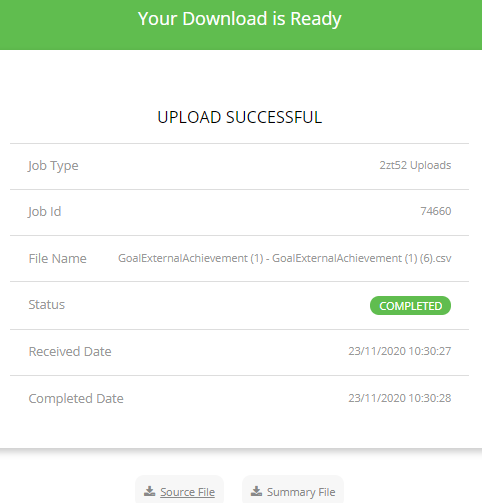
Step 2: Uploading the Template
- Log in to the Vymo web app.
- Navigate to Goals Bulk Upload and select 'Upload Goals'.
- Select and Upload the prepared file ensuring it's in the correct format.
- Wait for the upload confirmation and check the Upload History for Job ID and status.

Results
Assigned targets appear on the mobile app for the relevant users.
Troubleshooting
- Goal Code and Name: They must match what's specified in Goal Definitions.
- Duplicate Entries: Ensure there are no duplicates with the same User ID, Goal Code, and Frequency, even if Start and End Dates differ.
- Decimal Values: The system supports up to three decimal places. Any value beyond this is truncated to three decimals (e.g., 29.29432 becomes 29.294).
Always verify the details carefully before uploading to minimize errors and ensure the accurate assignment of targets.
Visual Guides
The following video shows how to download the template to use for uploading achievements.
See also
- Goals Overview
- Enabling Goals
- Setting Up Goals
- Setting Up Computed Goals
- Creating Goal Filters
- Creating User Score Goal
- Partner Goal Setting (Business Metrics)
- Goals Grouping
- Assigning Targets to People
- Uploading External Achievements