How to exclude specific modules from Coach Hello screen
By default, all modules that are made available for the phone app are also included on the Coach Hello screen. You can disable roles from viewing certain modules.
Dependencies
The roles that do not see the modules specified in this configuration are based on roles that have Coach screen enabled for them.
How to
Specify the modules to be excluded by following these steps:
- Log in to the Vymo web app and click the gear icon :octicons-gear-16: in the upper-right corner of the screen.
- Locate Global Settings > Feature Management > Coach.
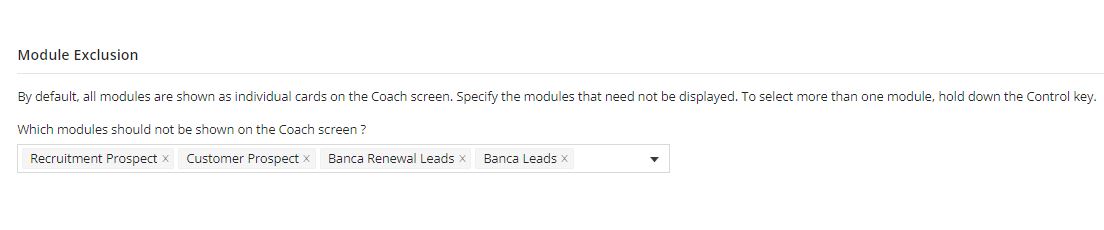
- Locate Module Exclusion and specify the modules to be excluded. You can select more than one module at a time.
Excluding specific modules from the Coach Hello screen through JSON
By default, all modules that are made available for the phone app are also included on the Coach Hello screen.
- Log in to the web app.
- Click Customize > Global Settings > JSON Configurations.
- Locate
features, and the array formanager_view. - Specify the modules that should not be displayed on the Coach Hello card by entering a comma-separated list of module codes for the
rolesModuleskey. For example, the following code snippet excludes the module with the codeleadsfrom the Coach Hello screen."cardsExclusionList": [ { "code": "business", "disableAll": false, "modules": [{"disabled": false,"module": "leads"}], "rolesDisabled": [ "TL", "SO" ], "rolesModules": [{"role": "TL","modules": [{ "disabled": false,"module": "leads" }] }], }, ], - Click Save. You see a message that the changes are now saved as a draft.
- In the message box, click Go To Release Management so that you can move the changes permanently to the live configuration.
- Click Create a UAT release. Specify the release details and make sure to enter your own email ID because that's where you receive a one-time password (OTP) to continue with the process. Click Proceed.
- Enter the OTP you received in the email, and click Submit. Wait for a while till you see a confirmation message saying the process is complete.
- To see the changes, log out and log in again.