Planning your day's route to nearby leads and partners
Phone app
This procedure works only on the phone app. To see map pins on the web app, see Giving location-based suggestions to your team.
If any of your meetings have a location associated with it, the meetings are displayed on the map and you see the route that can be followed. These meetings are shown in the form of pins. The meetings pins are numbered according to their order, which means that the meetings are shown in a sequence.
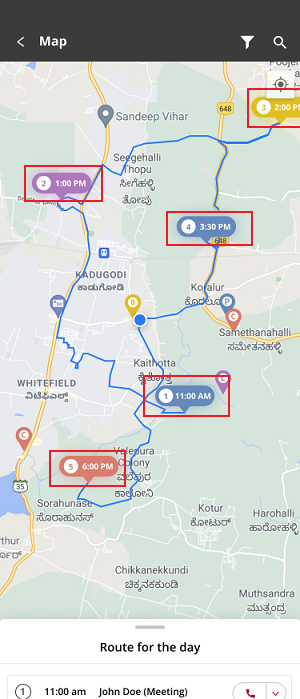
To see more information about a meeting, tap the meeting pin.
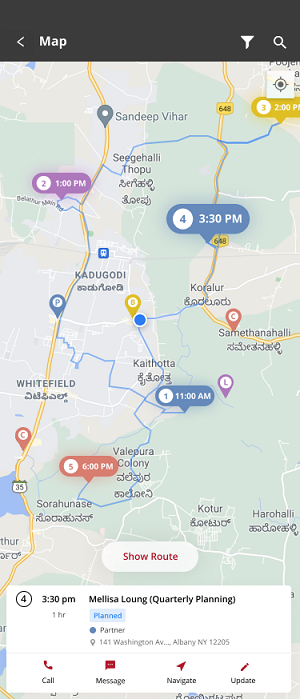
Meeting pins are scheduled activities, whereas nearby pins are opportunities for scheduling activities. Schedule a meeting with a lead or partner if they're present in your search radius in the map. The nearby pins are labeled by the initial letter of the module they belong to. For example, a partner named Evan belonging to a module called Agents has the letter 'A' in the pin.
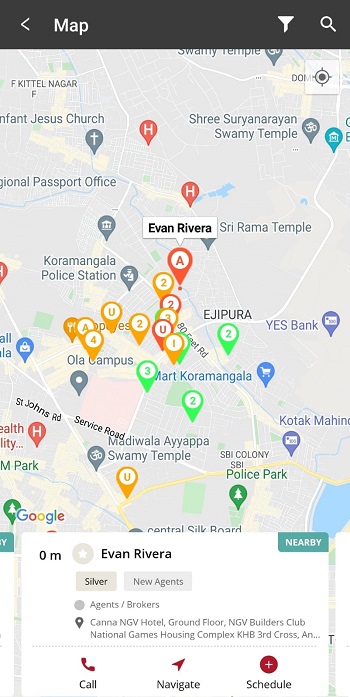
Meeting nearby leads and partners
Meeting state
Only leads who are in meeting states show as pins on the map. Partners don't go through states so they always show up on the map. To know more about states, see lead states.
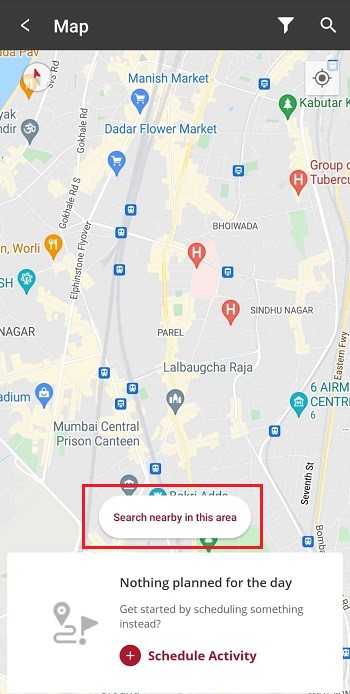
To see leads and partners in different areas, zoom out or move to another geographical area in the map and tap Search nearby in this area option. To schedule a meeting for a future date, use the filter option.
Configuring the nearby radius
Self serve
This procedure can be done only by a Vymo administrator.
While meeting pins are shown regardless of distance, nearby pins are shown only within a certain radius that can be specified according to your company's preferences. Use the following steps to set the radius for showing nearby pins:
- Log in to Vymo web app.
- Click Customize > Global Settings > Custom Configurations> additionalConfigs.
- Expand the
additionalConfigsobject and clickfeatures_config>nearby. -
Set the radius value in the
radiuskey. The unit is metres.{ "geofence_enabled": true, "radius": 20000, "label_to_marker_threshold": 0, "travel_mode": "walking" } -
In the message box, click Go To Release Management so that you can move the changes permanently to the live configuration.
- Click Create a UAT release. Specify the release details and make sure to enter your own email ID because that's where you receive a one-time password (OTP) to continue with the process. Click Proceed.
- Enter the OTP you received in the email, and click Submit. Wait for a while till you see a confirmation message saying the process is complete.
- To see the changes, log out and log in again.