Module Web Dashboards
Introduction
Different dashboards are available to various roles such as administrators, super users, and others when they log in to the web interface. The layout and options available in each dashboard are tailored to suit the specific needs and permissions of each role. This guide will walk you through configuring these dashboards.
In the Vymo platform, 'dashboard' refers not just to a data display interface, but also to the navigation menu accessed by different roles such as administrators, super users, and others upon logging into the web and app interfaces. The layout and options within each dashboard are specifically tailored to meet the distinct needs and permissions associated with each role. This guide provides a comprehensive walkthrough for configuring dashboards, clarifying that the same configuration principles apply to both module-level and global-level settings. We will cover how to customize these dashboards for both web and app interfaces, ensuring a consistent user experience across platforms. The guide will be organized to differentiate between the types of dashboards supported at the module and global levels, providing a structured approach to dashboard configuration.
Dashboard Types Based on Roles:
- Superuser Dashboard: Tailored with extensive functionalities and configuration options for overall app management.
- Manager Dashboard: Customized to cater to managerial tasks, tracking, and oversight.
- Everyone Else Dashboard: A generalized dashboard layout for regular users with standard features and limited configurations.
Configuration options:
- Cover: Measures business coverage, like client numbers or market share, indicating operational breadth.
- Productivity: Tracks efficiency, such as tasks completed or sales per employee, highlighting resource utilization.
- Allocations: Shows resource distribution, useful for strategic planning and identifying resource usage.
- Leads: Involves data on potential opportunities, including new leads and conversion rates, crucial for sales and marketing.
- Downloads: Counts resource downloads, useful for assessing content popularity and user engagement.
- Funnel: Displays customer engagement stages, from contact to sale, important for understanding the customer journey and improving conversions.
These components provide insights into different aspects of business operations, aiding in decision-making and performance monitoring.
| Option | Mandatory | Default values | Configurable | Dependencies |
|---|---|---|---|---|
| Dashboard Type | Yes | cover, productivity, allocations, leads, downloads, funnel | No | - |
| Dashboard Name | Yes | Cover, Productivity, Allocations, |
Yes | - |
| Code | Yes | cover, productivity, allocations, leads, downloads, funnel | No | - |
| Enable Dashboard access | No | - | Yes | - |
| Display order | No | - | Yes | - |
| Allowed Roles for dashboard | No | nil | Yes | The roles must exist. If they don't, create them at Global Settings > Role. |
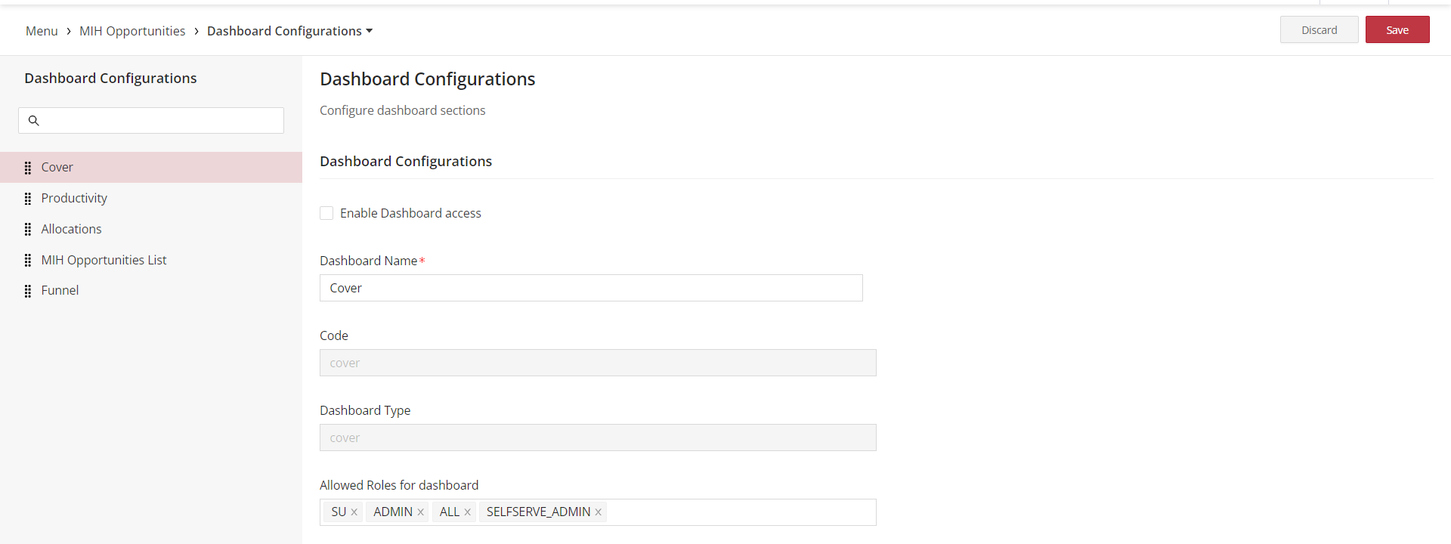
Dashboard Configuration Panel:
- Enable Dashboard Access: Checkbox to activate or deactivate the dashboard for users.
- Dashboard Name: Input field to specify or edit the name of the dashboard.
- Code: Input field where the system or user-defined code for the dashboard is provided.
- Dashboard Type: Input field where the system or user-defined type for the dashboard is provided.
- Allowed Roles for Dashboard: Here, you define which user roles have access to this dashboard. Multiple roles can be selected.
How to Configure the Dashboards for the Web App
Step-by-Step Configuration Guide:
- Login: login to self-serve.
- Access Dashboard Settings: Choose "Global Web Dashboards" from the Global Settings section. For the Module level, navigate to the desired module under module settings and click on “Global Web Dashboards”.
- Configuration: You will be presented with various dashboard configuration options. Use the table above as a reference to understand each option's purpose, defaults, and dependencies. Customize as per your requirements.
- Saving Changes: After making your desired changes, always click the "Save" button to apply the configurations.
- Releasing Changes: Once saved, ensure you release the changes so they're effectively applied to the intended users. If you create more roles later, return to this configuration and review the dashboard access those roles have.
How to Disable a Dashboard
To disable a dashboard that is no longer needed or relevant:
-
Access Dashboard Settings: As in the configuration guide.
-
Select the Dashboard: Choose the dashboard you wish to disable.
-
Disable Dashboard Access: Uncheck the "Enable Dashboard Access" option.