I18n Settings
Introduction
The i18n (internationalization) settings allow users to customize various locale-specific attributes for their platform. This guide provides a detailed walkthrough to ensure accuracy and comprehension during configuration.
Navigating to i18n Settings
- Log In:
- Navigate to the platform's login page.
-
Enter your credentials and log in.
-
Access Global Settings:
-
Once logged in, locate the "global settings" menu or tab and click on it.
-
Click on 'i18n Settings':
- Under the global settings, find the "i18n Settings" option and select it.
- Click on "Locale settings".
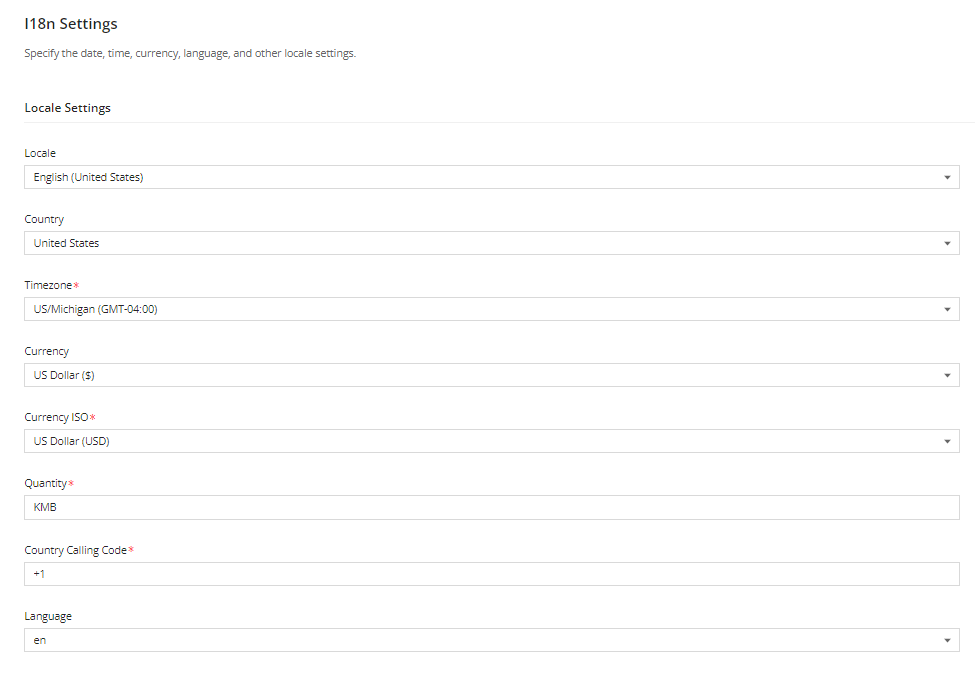
Configuration Options
Here are the available configuration options for the i18n settings:
| Option | Mandatory | Default Values | Configurable | Dependencies |
|---|---|---|---|---|
| Locale | No | English (India) | Yes | |
| Country | No | India | Yes | |
| Timezone | Yes | Asia/Kolkata (GMT+5:30) | Yes | |
| Currency | Yes | Indian Rupee (₹) | Yes | |
| Currency ISO | Yes | Indian Rupee (INR) | Yes | |
| Quantity | Yes | KLC | Yes | Must be either KLC (thousand, lac, crore) or KMB (thousand, million, billion) |
| Country calling code | Yes | 91 | Yes | |
| Language | Yes | EN | Yes |
Note: - The values in the currency and currency ISO fields aren't validated against each other. This means you can set the currency to be "Indian Rupee (₹)" while having the currency ISO as "Iraqi Dinar (IQD)". - The locale settings at the global level can be overridden by module-level settings. Therefore, adjustments made here may not necessarily be final if there are overriding configurations at the module level.
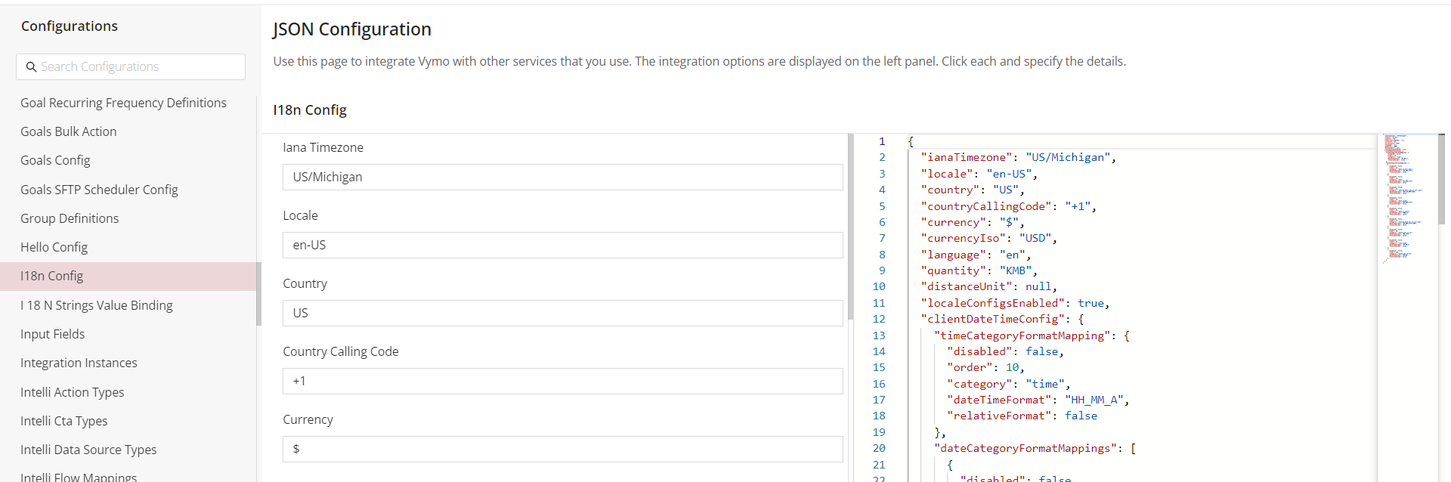
HOW TO CONFIGURE I18N SETTINGS THROUGH JSON
Introduction
This guide provides step-by-step instructions on configuring i18n settings through JSON in Vymo. i18n (internationalization) settings allow users to set locale-specific preferences.
Navigating to JSON Configurations
- Access the Platform:
- Navigate to Vymo's login page.
-
Log in using your credentials.
-
Go to Global Settings:
- Once logged in, navigate to "self-serve".
-
Click on "Global Settings".
-
Access JSON Configurations:
- Find and select the "JSON Configurations" option.
Editing the i18nConfig Array
- Locate the i18nConfig Array:
-
Scroll through the configurations until you find the i18nConfig array.
-
Expand the Array:
-
Click to expand the array and view its contents.
-
Modify the Settings:
- Edit the relevant fields based on your requirements.
Integrating with Other Services
- View Integration Options:
- On the left panel, you'll see integration options available.
- Click on each integration option and provide the necessary details.
Saving & Releasing Changes
- Save Your Changes:
- After making all necessary modifications, click "Save".
-
A message will appear, indicating the changes are in a "Draft" condition.
-
Proceed to Release Management:
-
Click on "Go To Release Management" within the message box.
-
Create a UAT Release:
- Click "Create a UAT release".
- Fill in the release details. Ensure you input your email ID, as you'll receive a one-time password (OTP) there.
- Click "Proceed".
-
OTP Verification:
- Check your email for the OTP.
- Input the received OTP in the designated field and click "Submit".
- Wait for a confirmation message, indicating the completion of the process.
Verifying Changes
- To verify the changes you've made:
- Log Out and Log In:
- Log out of the platform.
- Log back in to see and verify the changes you've made to the i18n settings.