Creating partners
Adding and Managing Partners in Vymo
Adding Partners
- Individually: Add partners one at a time through the interface.
- Bulk Upload: Upload multiple partners simultaneously using a spreadsheet template.
Partner Information
Each partner record by default includes:
- Name
- Phone Number
- Email ID
- Office Address
- Home Address
- Status
- Tier
- Recruitment Date
- Engagement Frequency
You can also specify additional attributes for each partner based on your business needs.
Allocation and Prioritization
- Rule Application: If your company has allocation or prioritization rules configured, they are automatically applied when a partner is added.
- Editing and Reassignment: You can edit a partner’s details and manually reassign them at any time, which allows you to override the automatic allocations.
Adding partners one by one
You can add a partner through both the web app and mobile app. If you don't save the partner details after entering them, they're saved as drafts that you can save, update, or delete later.
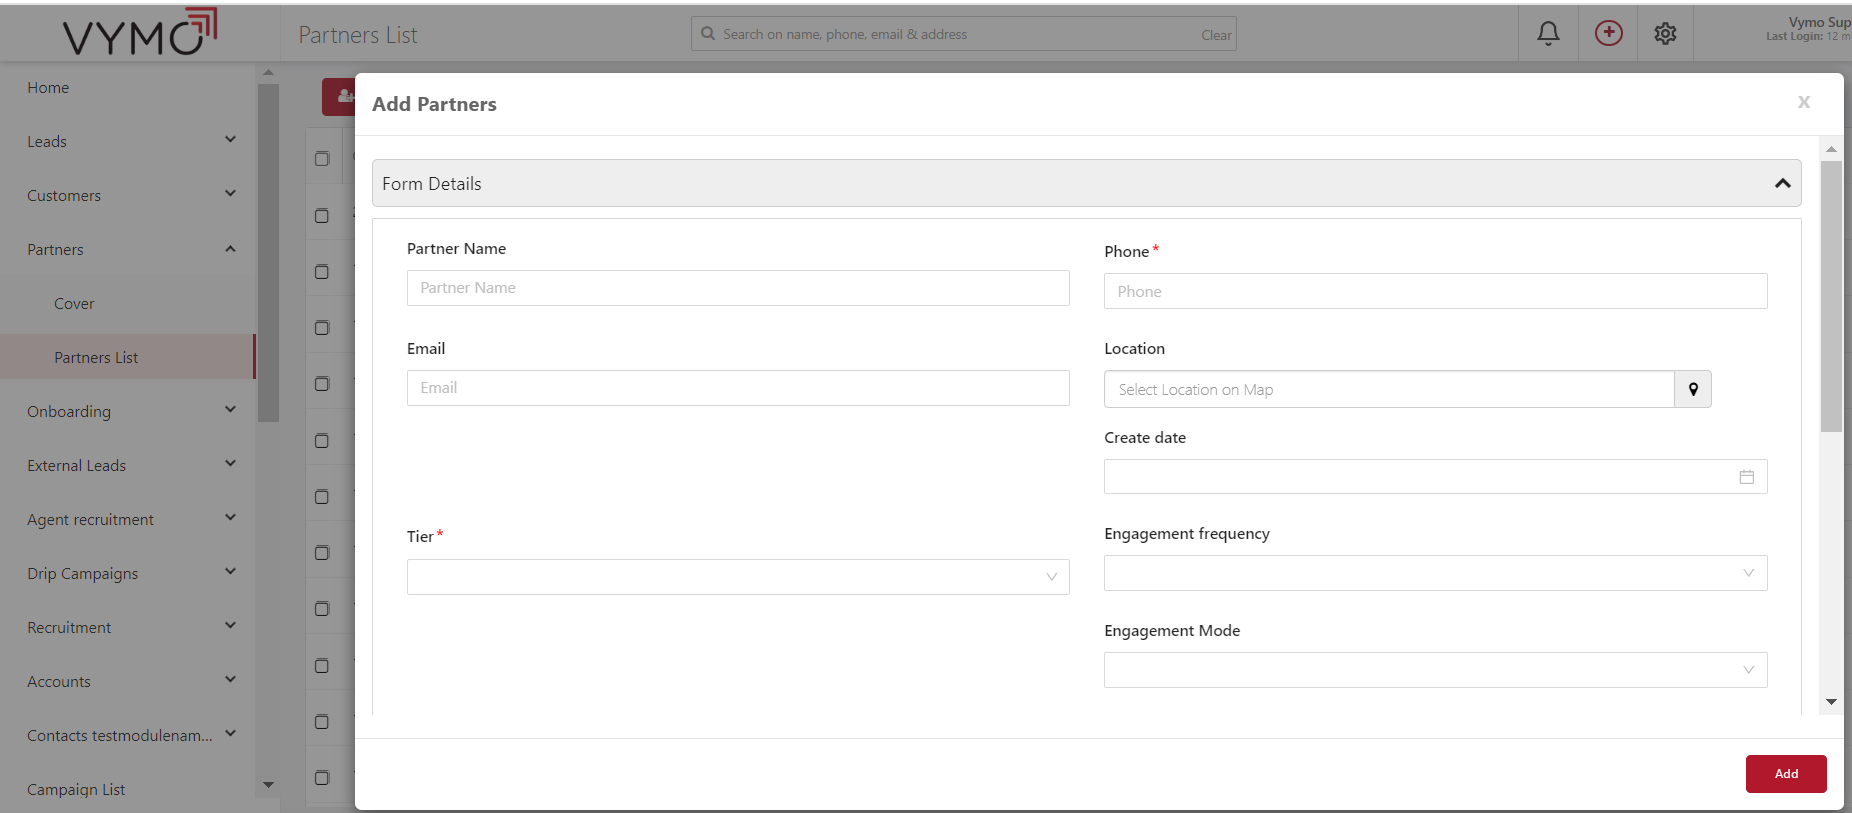
- Log in to the Vymo web application.
- Click Partners > Partners list. Depending on how the application was configured for your company, Partners and Partners List might be named differently, for example, Agents and Agents List.
- Click Add, enter the partner information, and click Add.
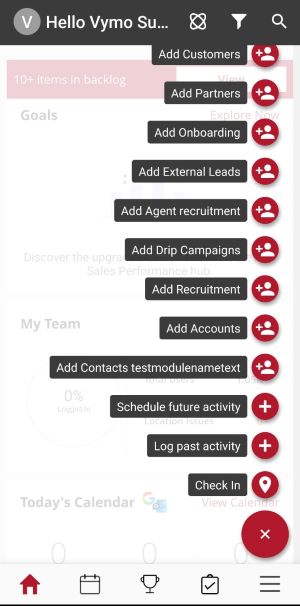
- Open the Vymo app.
- Tap the large Plus button near the bottom right of the screen.
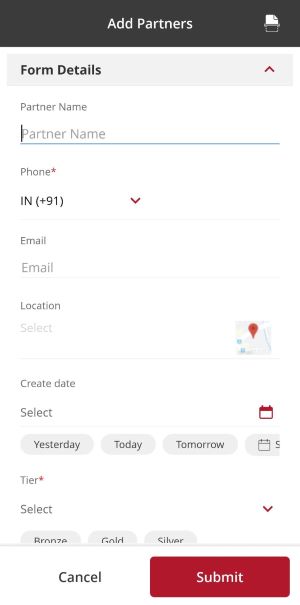
- Tap Add Partner and follow the onscreen instructions.
Adding a partner by scanning their business card
You can add a partner by scanning their business card. The name, email, phone number, and address is scanned. You can, then, verify and tag the information, which is displayed on the partner details screen. You can scan cards that are in English, Indonesian, Japanese, Thai, and Vietnamese.
- Open the Vymo app.
- Tap the large Plus button near the bottom right of the screen.
- Tap Add Partner > Scan Card near the top right of the screen. Depending on how the application is configured for your company, Partners and Partners List might be named differently, for example, Agents and Agents List.
- Place the card on a flat surface, point the phone camera to it, and record the information.
- Review the information, make corrections if needed, and tap Add.
Uploading partners in bulk
You can't upload partners in bulk through your mobile device; you must use the web application. You use a .csv, .xls, or .xlsx file.
Before you begin
Download the template for uploading partners in bulk from the Vymo web app. To enable the upload and download options for the company at the global level, see Enabling the import and export of data.
To download the default template, use the following steps:
- Log in to the Vymo web application.
- Click Partners > Partners list. Depending on how the application is configured for your company, Partners and Partners List might be named differently, for example, Agents and Agents List.
- To download the template, click Bulk Upload > Download template.
- Enter the partners data in the spreadsheet. Make sure that the file contains 100,000 or fewer records, and is 100 MB or smaller.
Steps
After downloading the template, enter leads data and upload leads in bulk through the web application.
- Log in to the Vymo web application.
- Click Partners > Partners list. Depending on how the application is configured for your comp, Partners and Partners List might be named differently, for example, Agents and Agents List.
- Click Bulk Upload, select the file, and click Upload.
The partners are added to the list and duplicates, if any, are ignored.
Assigning partners
If allocation rules are configured for your company, the rules are applied to automatically allocate partners to your team. You can, however, manually over-ride such allocations for every partner. All changes and updates made to a partner are logged, and displayed as its audit history.
- Web app:
- Log in to the Vymo web application.
- Click Partners > Partners list. Depending on how the application was configured for your company, Partners and Partners List might be named differently, for example, Agents and Agents List.
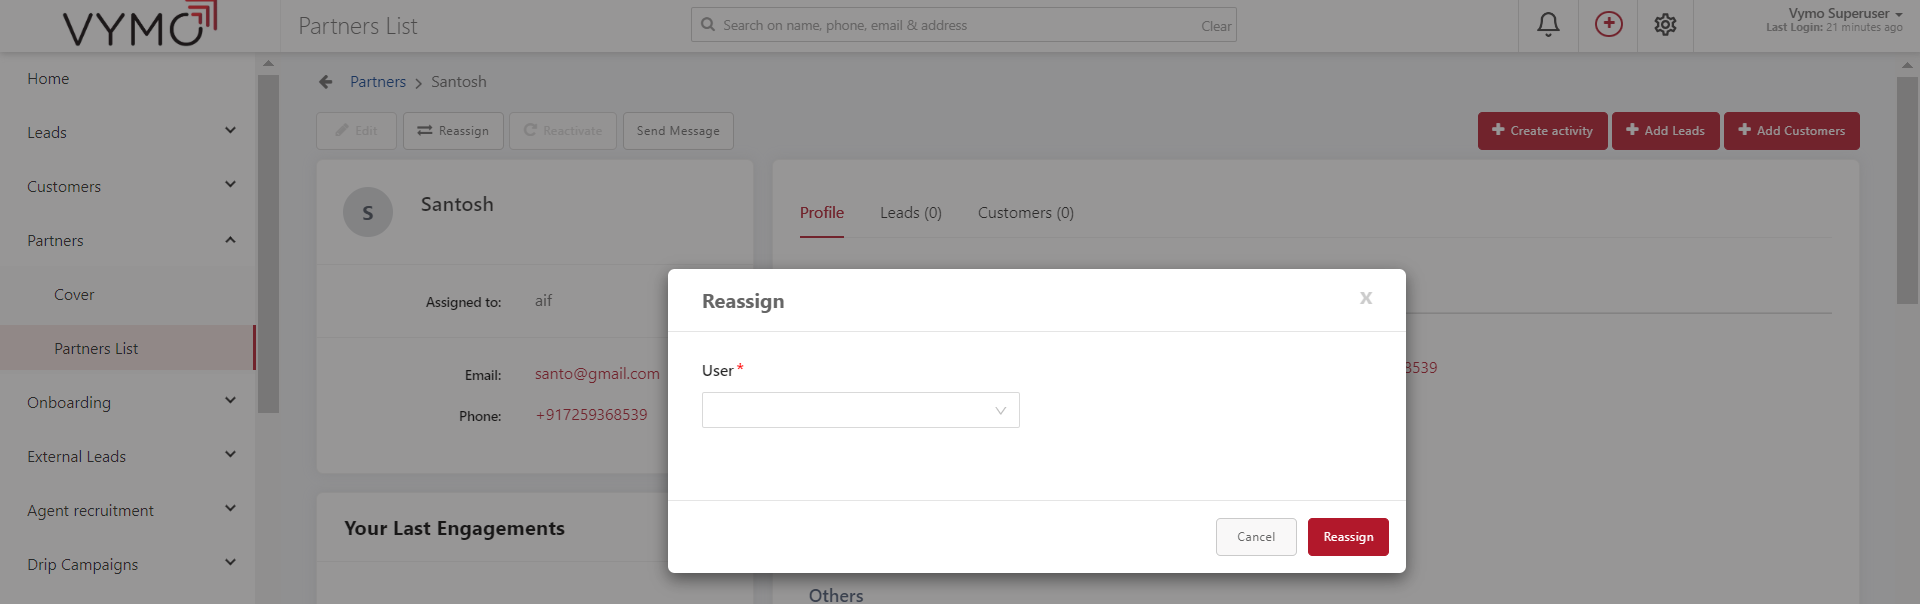
- Select the partner to assign, and click Reassign.
- Select the person to assign the partner to, and click Reassign.
Editing partners
At any time after a partner's been added, you can change any of the information. All changes and updates made to a partner are logged, and displayed as its audit history.
- Log in to the Vymo web application.
- Click Partners > Partners list. Depending on how the application was configured for your company, Partners and Partners List might be named differently, for example, Agents and Agents List.
- Click the row for the partner to edit.
- Click Edit, change the information as needed, and click Save.
- Open the Vymo app.
- On the Partners card, tap View All. Depending on how the app was configured for your company, Partners might be named differently, for example, Agents.
- Locate the partner to edit and tap it.
- On the Details page, tap > on the first card.
- Tap the Edit button near the bottom right of the screen, change the information as needed, and tap Update.
Exporting partners
You can download a .xlsx file that contains the details of all partners in a module. The default filter is Month To Date (MTD); you can extend the date range to 60 days. The exported file is available for an hour after the download request is completed.
To download partners, you must use the web application.
- Log in to the Vymo web application.
- Click Partners > Partners list. Depending on how the application was configured for your company, Partners and Partners List might be named differently, for example, Agents and Agents List.
- Click Download List. A
.xlsxfile is generated, which you can open immediately or save it to your computer.