How to Create Activities
In Vymo, activities play a crucial role in managing and tracking tasks. There are two main types of activities:
Module-specific Activities
- Description: Tasks specific to a particular module, like reaching out to a lead.
- Configuration: Configured within specific modules like leads or partners.
User Activities
- Description: Broad tasks not specifically tied to any module, such as team meetings.
- Considerations:
- Activity Medium: Defines the allowed medium for each activity (e.g., phone calls, Zoom meetings). The '[task.type]' field in the current SSUI will be replaced with a 'medium' field.
- Activity Type: Refers to the name or title of the activity. For each medium provided by Vymo, a corresponding activity type is automatically created.
Configuration Options
Available Activity Types
- For Modules: Meeting, outgoing call, incoming call, reminder, web conference, email, LINE WORKS chat, LINE WORKS chat disposition.
- For Generic Activities: Additional choices of Office 365 calendar and Zoom.
Permissions
- Define roles eligible to create the activity.
- Determine roles to which the activity can be assigned.
- Specify roles that can participate in the activity.
Additional Configuration
- Include participants after marking the activity as complete.
- Automatically close activities post a defined number of days.
- For a detailed list, consult "Reference: Activities".
Steps
- Log in to self-serve.
-
For Module-Level Activities:
-
Navigate to 'Module Settings'.
- Click on the desired module.
- Select 'Activity Management'.
-
For Generic Activities:
-
Head to the 'User Management' section.
-
Click 'Activity Management'.
-
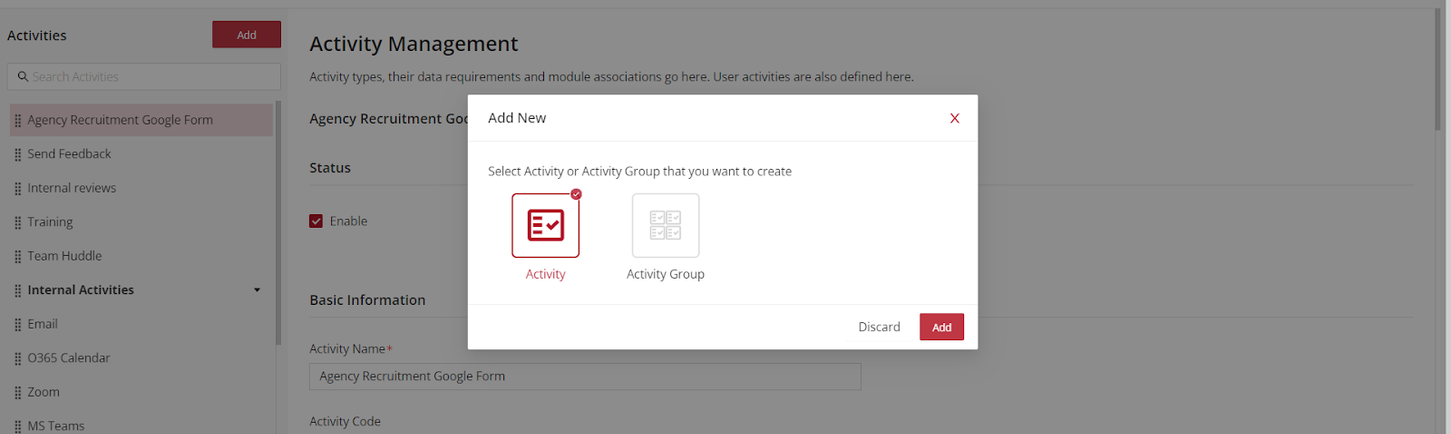
On the left menu, click 'Add' and then choose 'Activity’ from the pop-up.
- Enable the activity using the 'Enable' option.
- Provide a suitable name for the activity.
- Choose the activity type from the available options.
- Select appropriate roles for 'Choose the roles the activity is allowed for'.
- Specify the roles that the activity can be assigned to and determine the number of assignees.
- Define the roles that can participate in the activity and decide on the number of participants.
- For each action enabled for the activity:
- Click on 'Manage Fields'.
- Drag and drop the desired fields for the form when creating or updating the activity.
- Use 'Return to Activity Management' to go back.
- Configure any additional options as required.
- Click 'Save' located near the top right.
- Release the changes to make the activity available.
See also
- Activity Management