Activity roll up
Understanding Activity Roll-Up in Vymo
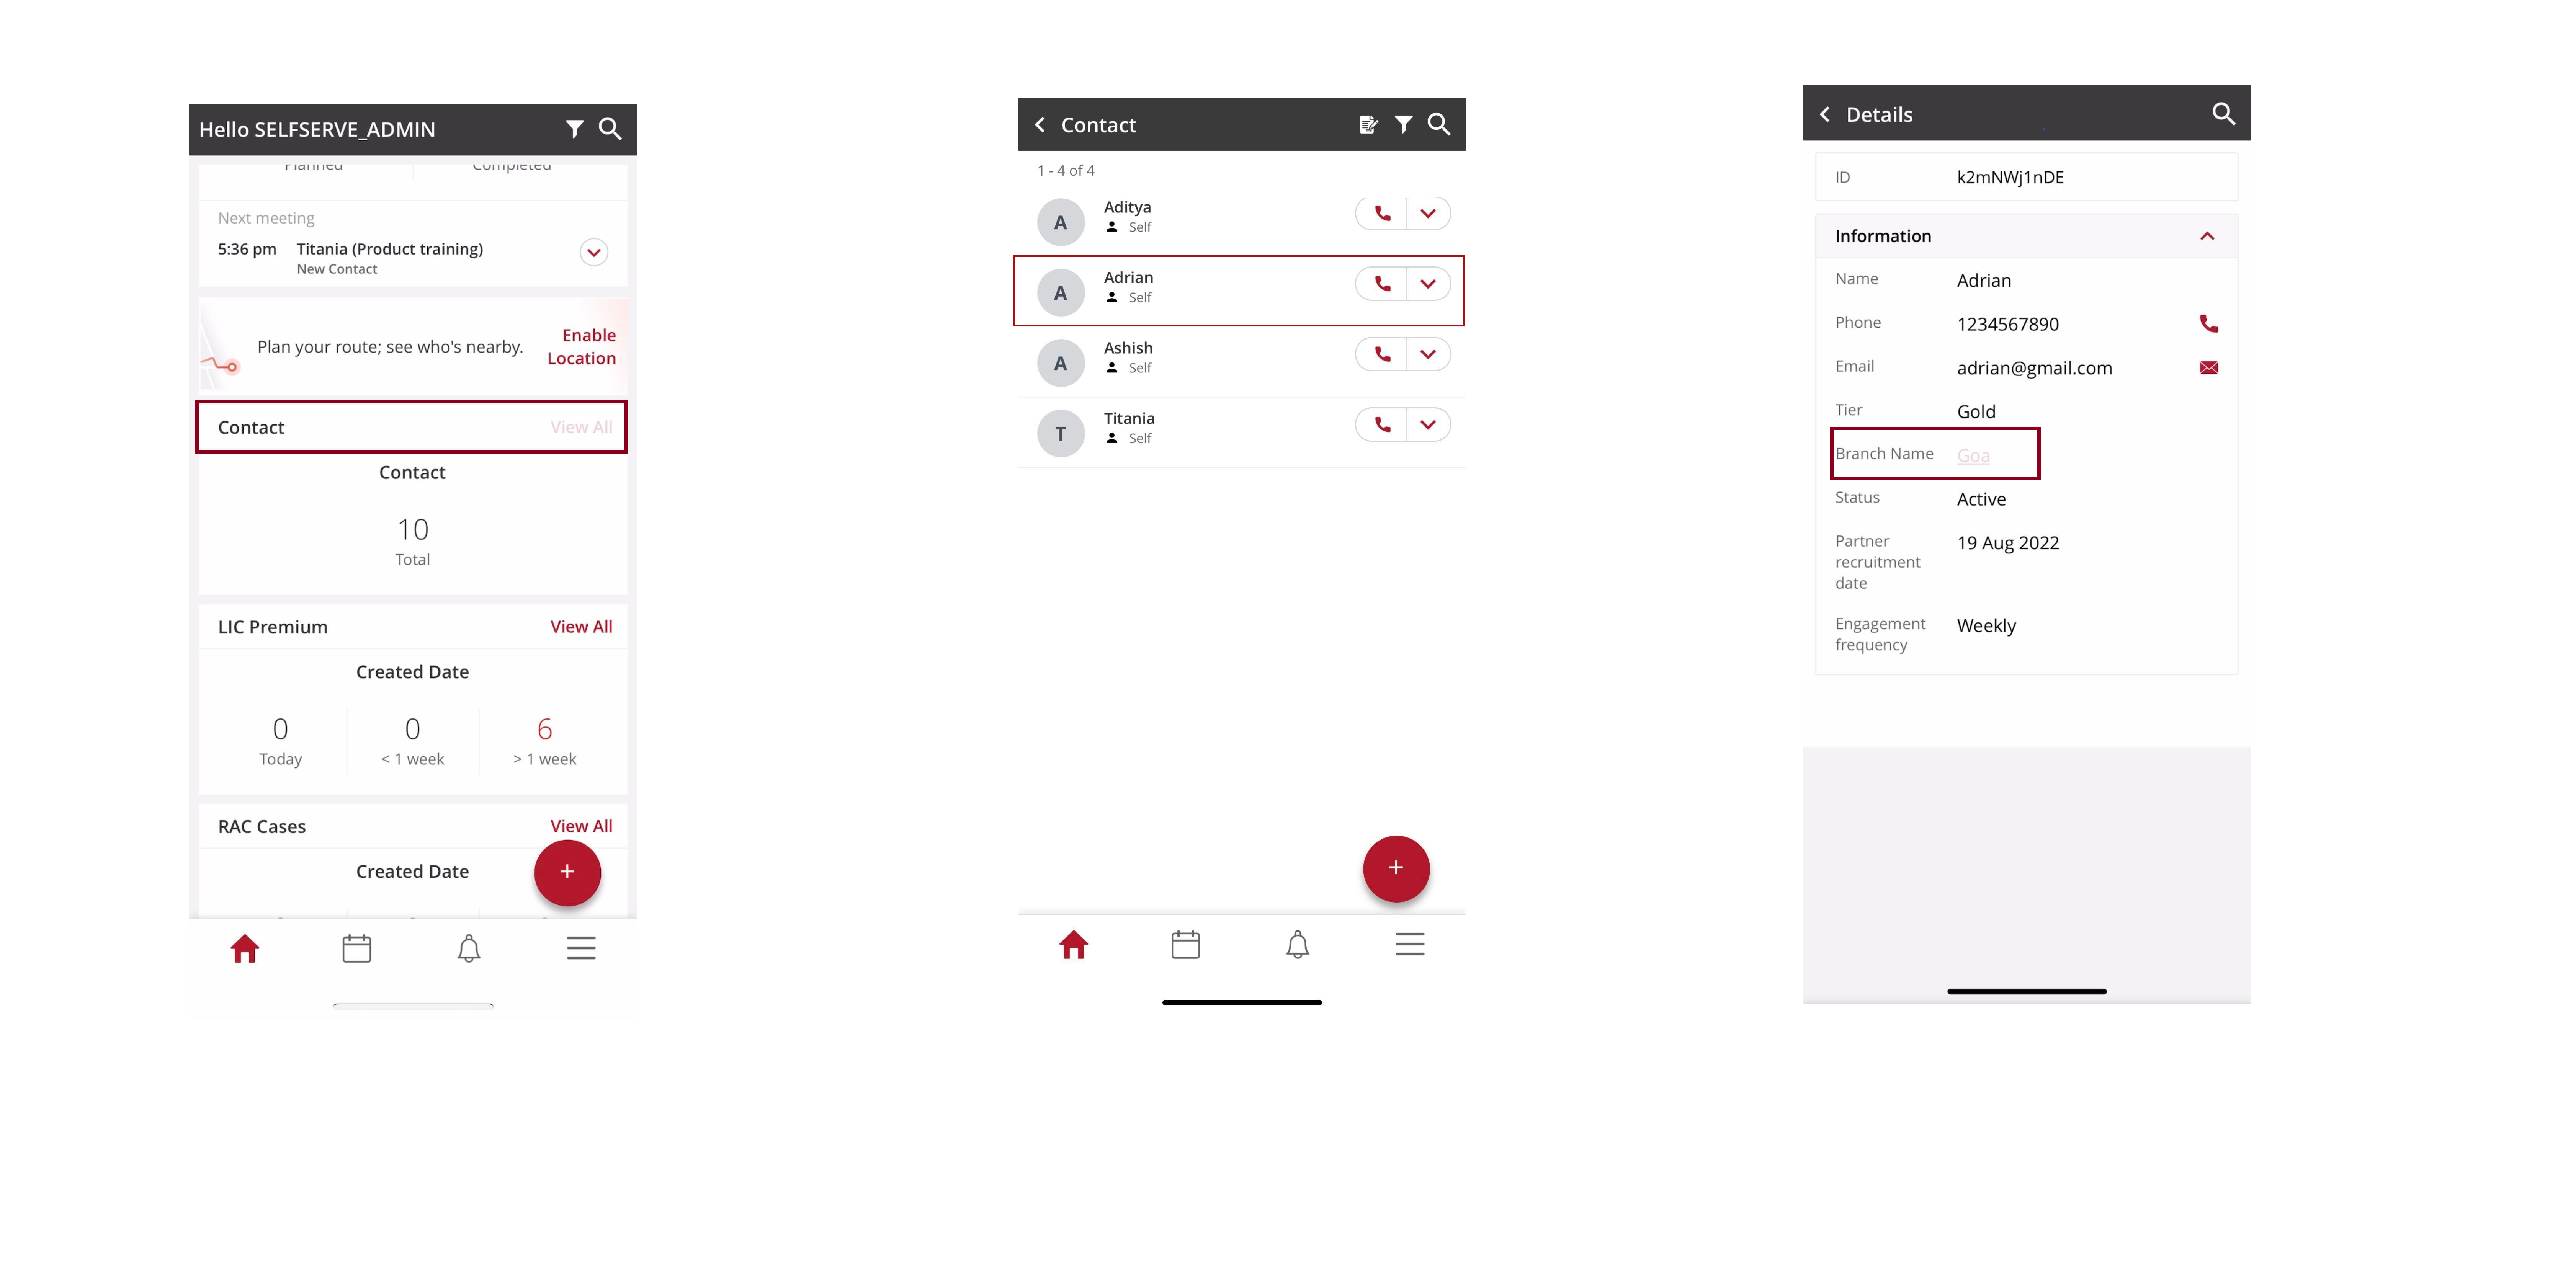
Activity roll-up is a feature in Vymo that enables the visualization and management of activities linked across different modules. This capability allows for a comprehensive view of interactions based on specific branches or contacts.
How It Works
- Module Linking: Activity roll-up facilitates linking two different modules by utilizing a referral field. This linking allows activities associated with one module to reflect in another.
Creating and Linking Contacts
- Contact Creation: When creating a contact within a module, include the specific branch as one of the fields. This establishes a direct link between the contact and the branch.
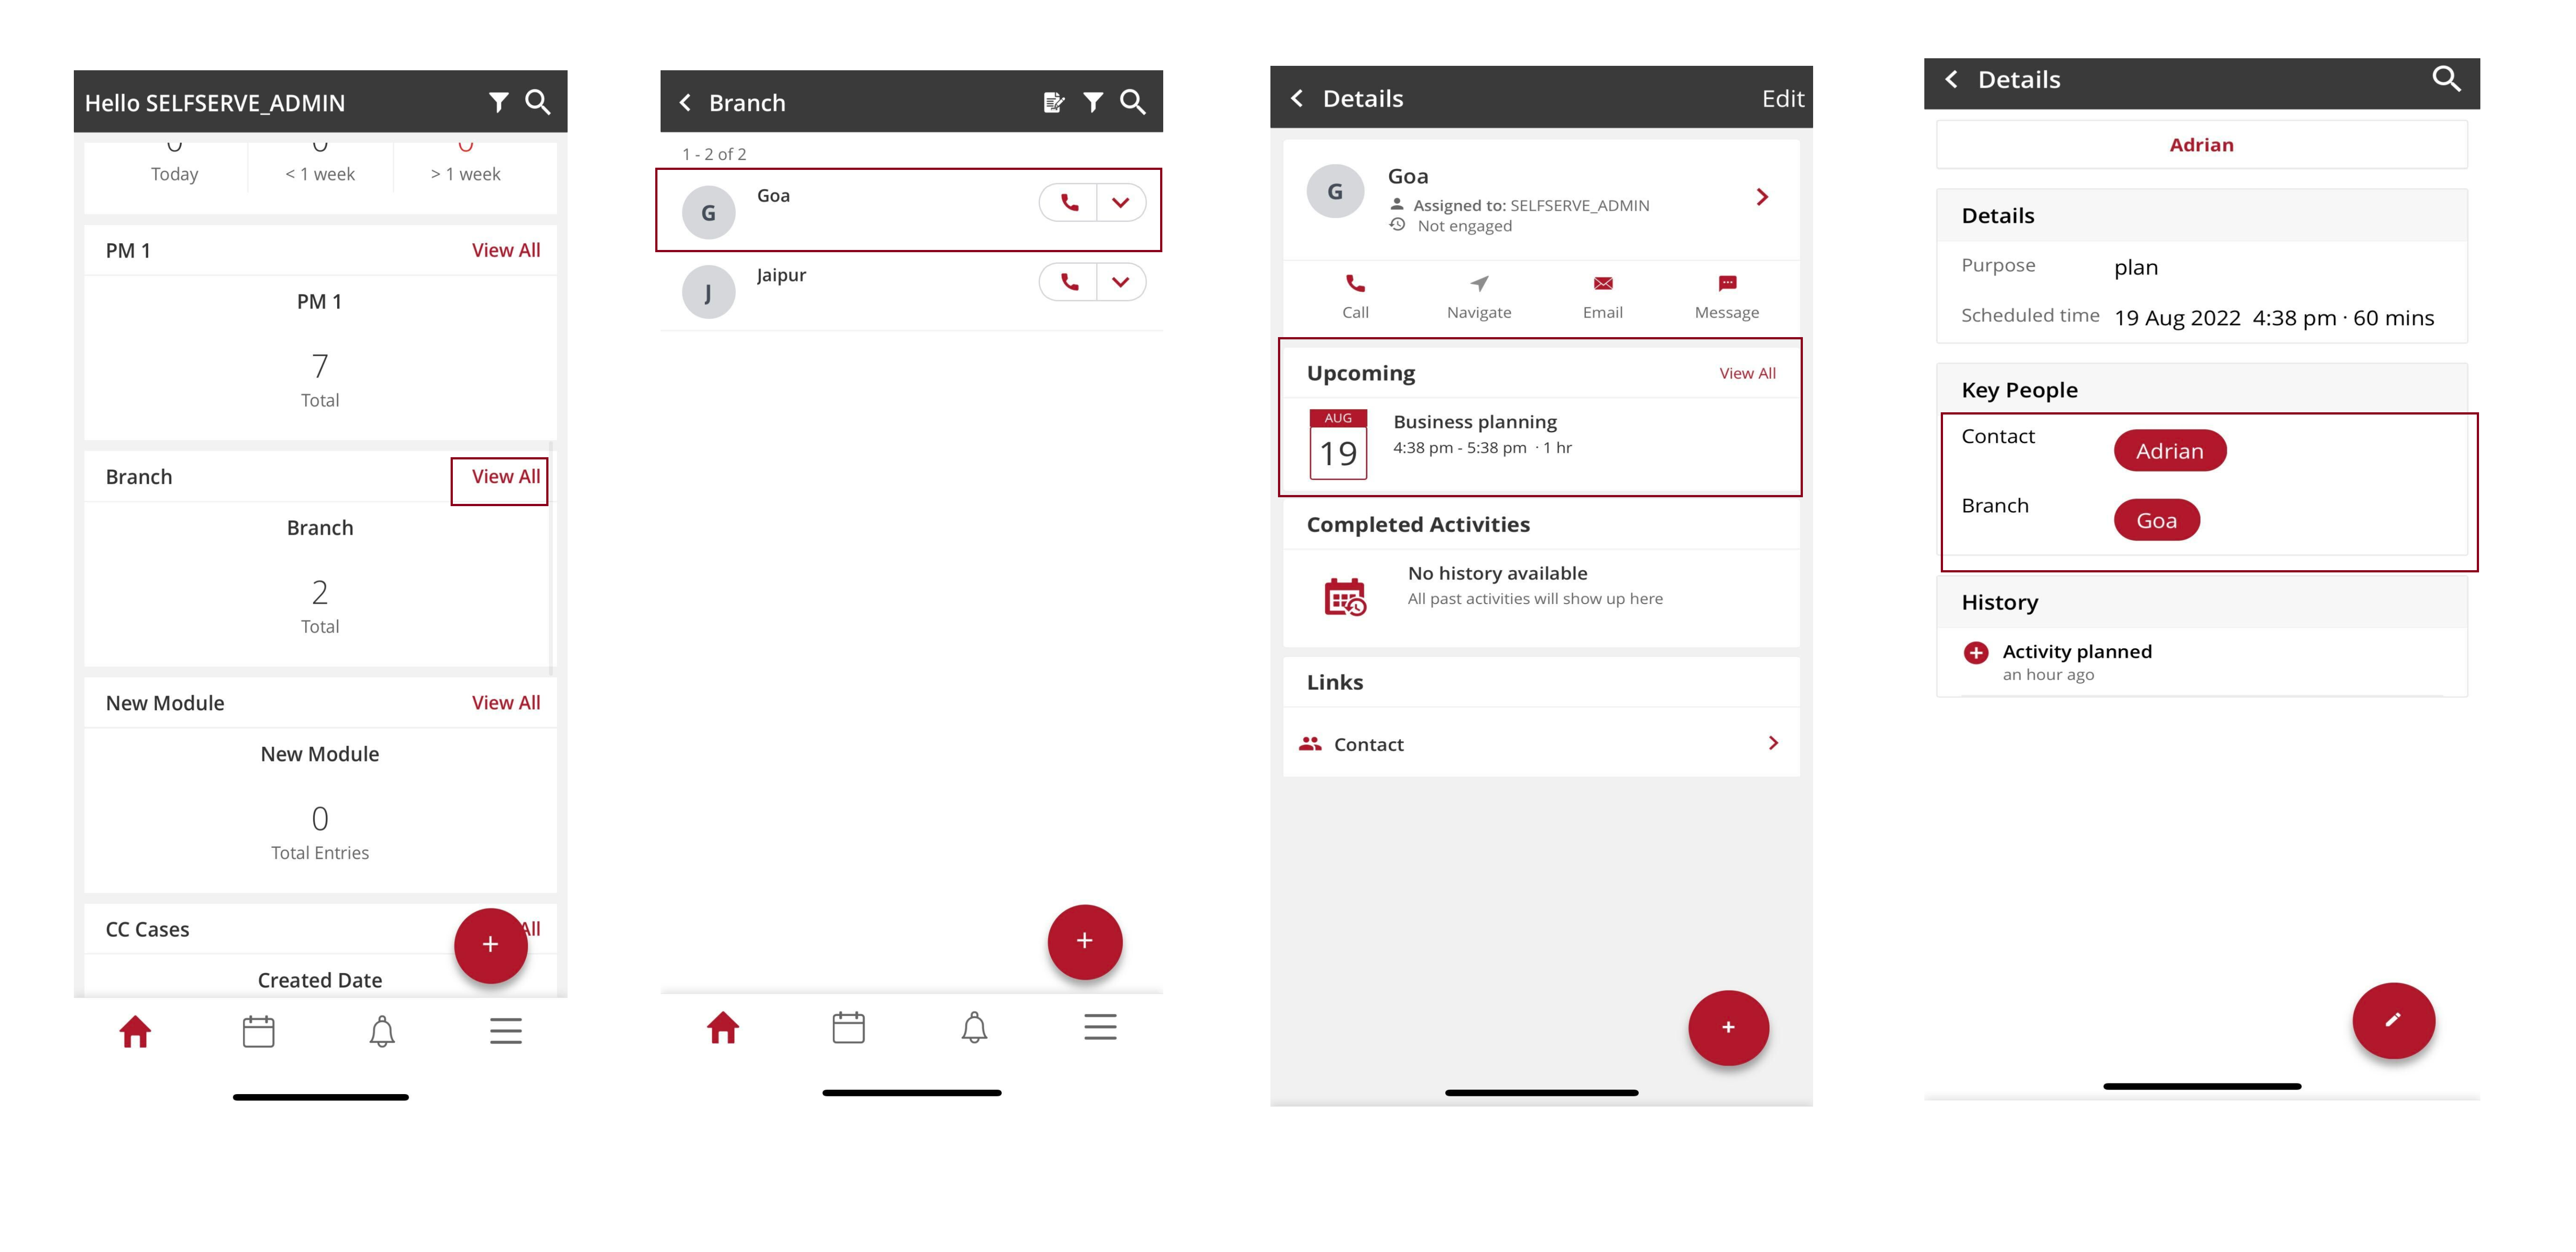
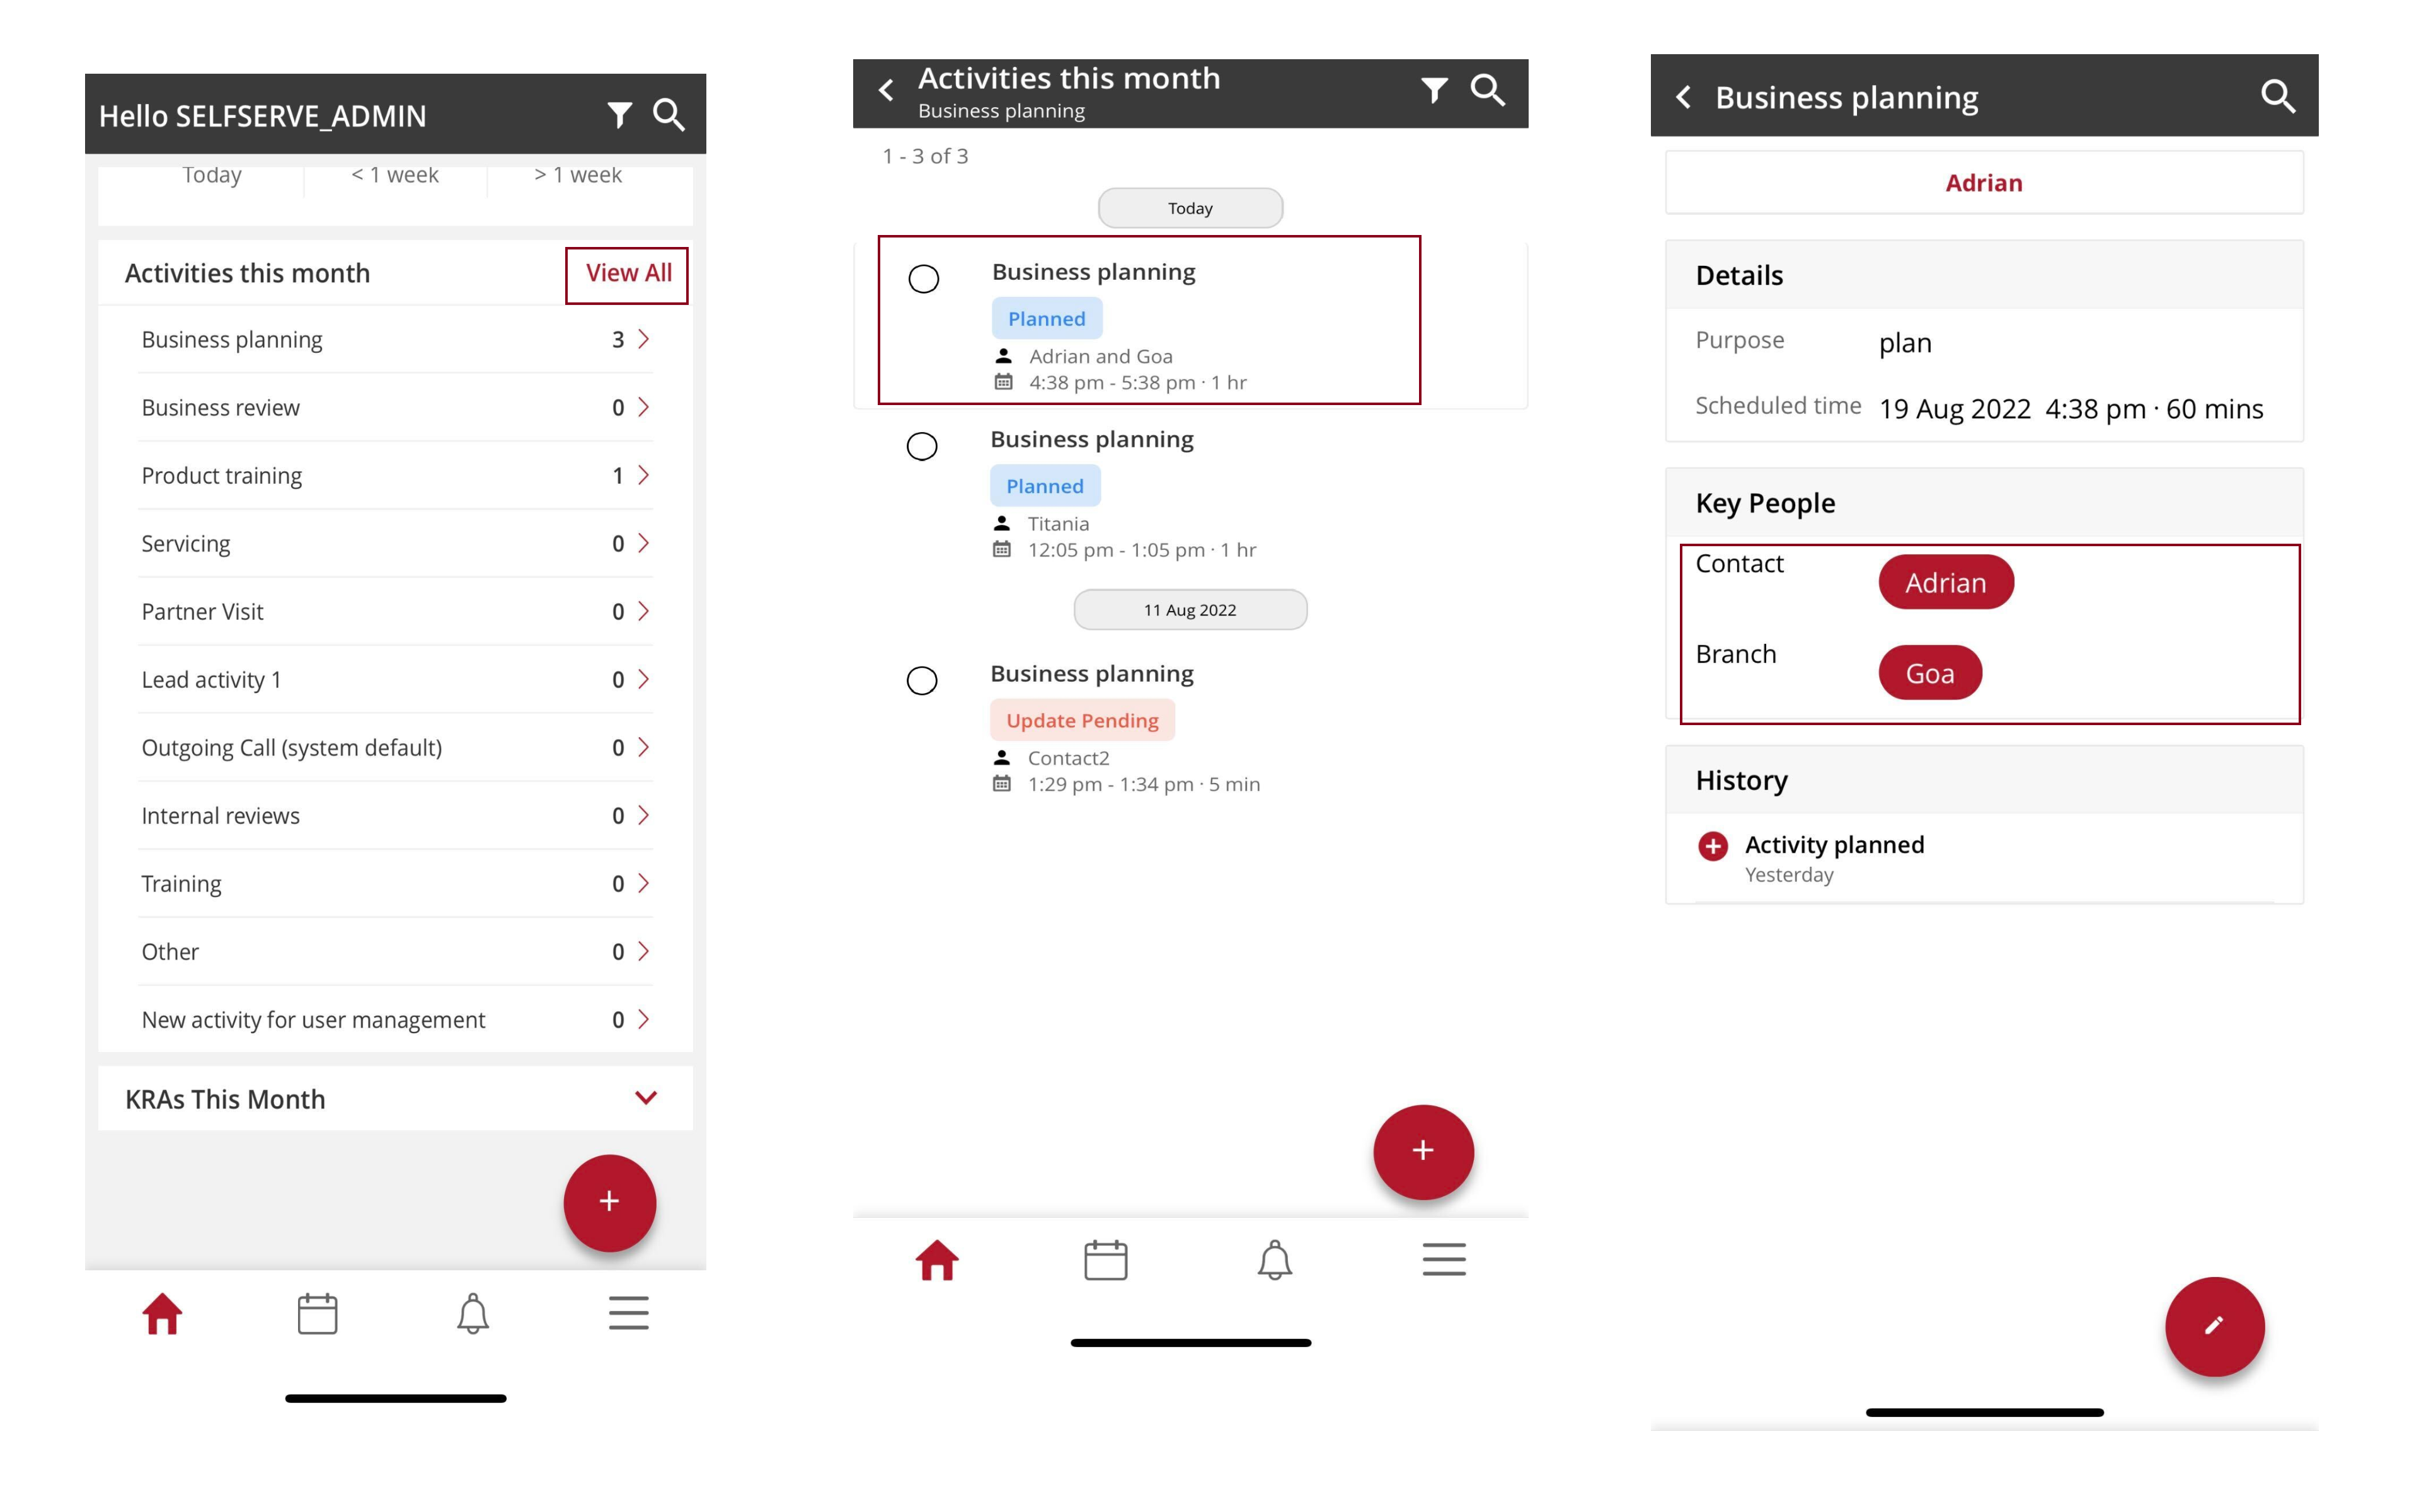
- Activity Reflection: Any activity that is logged in or scheduled with the contact will automatically appear in the records of the specified branch.
Viewing Activity Details
- Branch Module Insights: Within the branch module, you can view detailed records of all individuals who have interacted with the branch through various activities. This roll-up provides a consolidated view that helps in understanding engagement and interaction patterns at the branch level.
By using activity roll-up, different modules within Vymo can be interconnected, providing a unified view of activities and enhancing the management and tracking of engagements across different sectors of the organization.
Prerequisites
To roll up activities of one module to another, select the other module as source in referral field.
Steps
- Log in to Vymo web app and navigate to self serve.
- Select a module and go to Field Configurations.
- Drag Referral field from the Add New list to the centre to create a referral field. See how to create referral field
- Fill in the basic information.
- Select a source module, which you want as a referral from the dropdown in Field Level Settings. You can add multiple referral fields.
- Click Save. You see a message that the changes are now saved as a draft.
- In the message box, click Go To Release Management so that you can move the changes permanently to the live configuration.
- Click Create a UAT release. Specify the release details and make sure to enter your own email ID because that's where you receive a one-time password (OTP) to continue with the process. Click Proceed.
- Enter the OTP you received in the email, and click Submit. Wait for a while till you see a confirmation message saying the process is complete.
- To see the changes, log out and log in again.
Results