Lead list filter
Configuring lead list filters in Vymo allows users to customize and streamline the display of lead information based on specific criteria. This ensures efficient management and organization of leads according to individual preferences. Below are two methods for configuring lead list filters: through the web app and global setting
How to (for web app)
- Access the Vymo web application using your credentials.
- Go to the JSON configurations under the Module Settings section
- Navigate to voListDashboardMappings > columnMappings and set appropriate values for the given keys to configure lead list columns and filters.
- Navigate voListDashboardMappings > expand
voListDashboardMappings>columnMappings. -
save and release the changess.
{
  "type": "vo-system-column",
  "disabled": false,
  "order": null,
  "title": "Regions",
  "visible": false,
  "sortable": true,
  "group": "1",
  "export": false,
  "columnType": "region",
  "field": "regions",
  "queryField": null,
 "filter": true
}
Configure through Global Settings (Alternative way)
- Log in to the Vymo web application using your credentials.
- Go to Global Settings > JSON Configurations.
- dashboard_configs > leads > columns. If not found, create these attributes.
-
Collapse each object of the list to access further keys. If you don't find any keys then add the following attributes.
- The
disabledkey determines the enabling and disabling of the field. Set it totrueto disable it andfalseto enable it. - The
titlekey determines the field on lead list filter. - The
filterkey determines the visibility of the field on the filter panel. Set thefilterkey totrueunder each object to enable the field on filter panel. To disable, set it tofalse. - The
visiblekey determines the visibility of the field on the columns of lead list page and not the lead list filter panel. Set the value ofvisiblekey totrueorfalsebased on your requirements.
{ "disabled": false, "title": "Regions", "visible": false, "sortable": true, "group": "1", "export": false, "type": "region", "field": "regions", "filter": true } - The
-
Click Save, and release the changes.
Note
If you cannot locate JSON objects under additionalconfigs, create them.
By following these methods, users can efficiently configure lead list filters according to their requirements, enhancing the visibility and accessibility of lead data within Vymo.
Results (for web app)
- Access the Vymo web application using your credentials.
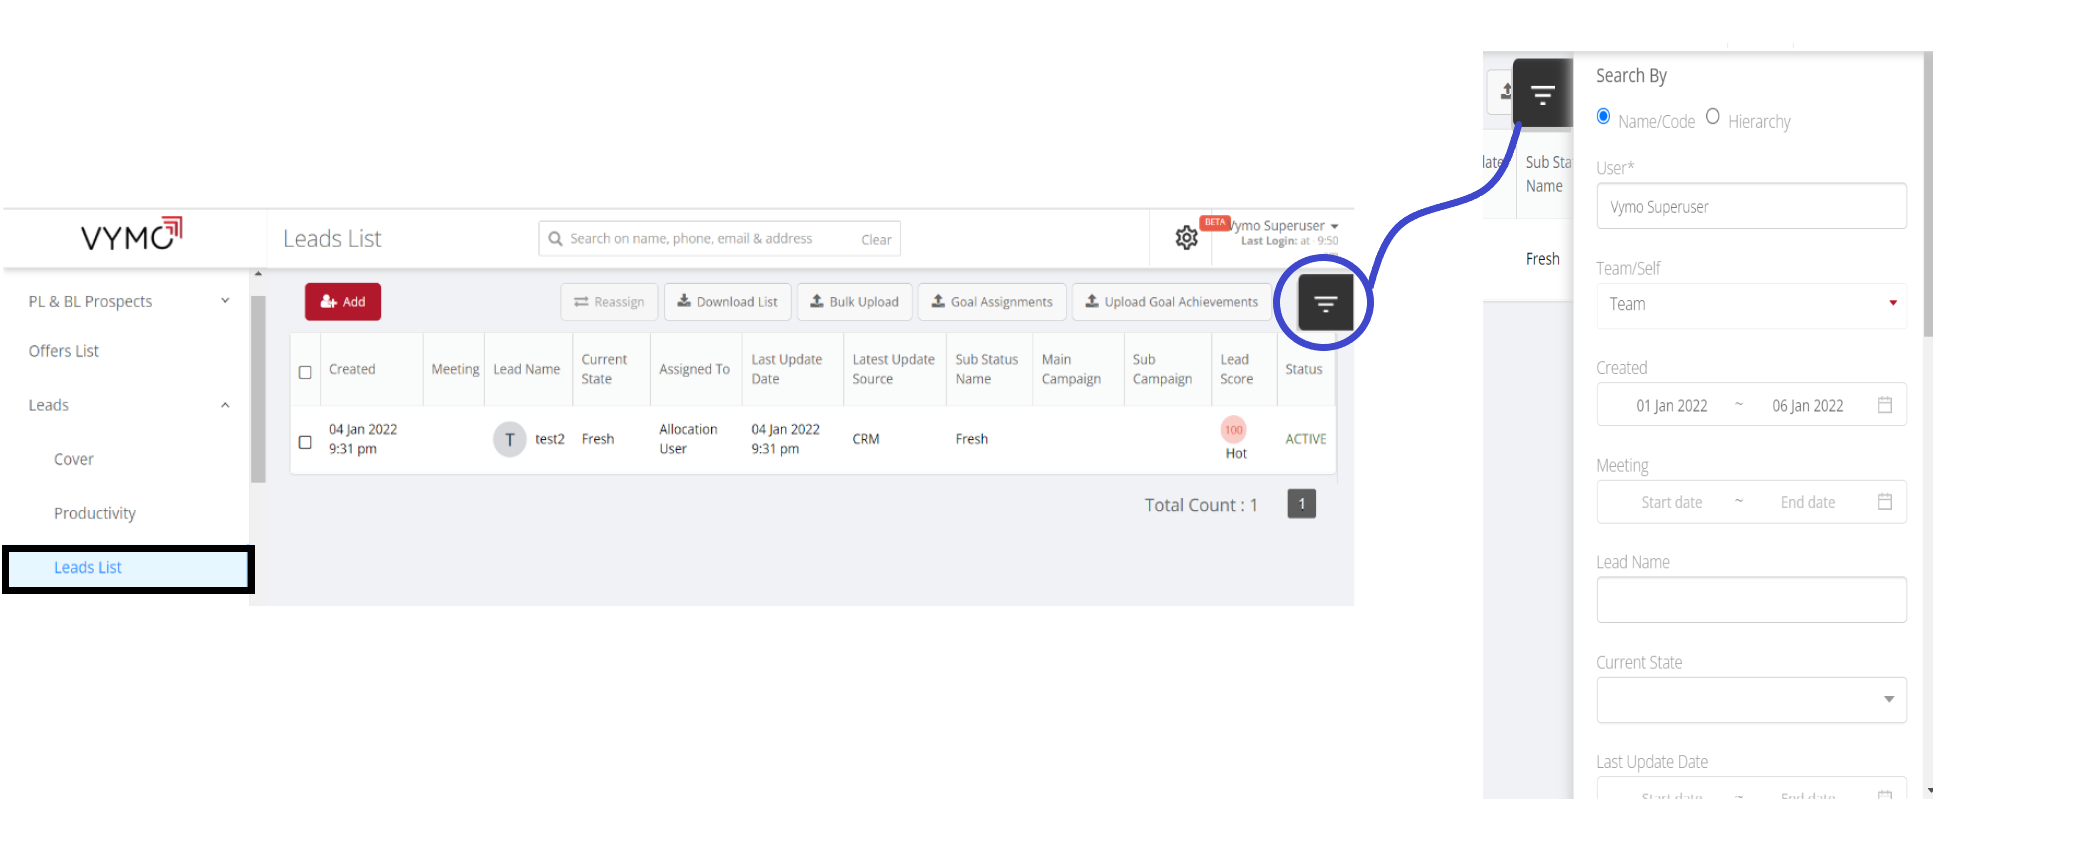
- Go to Leads > Leads List.
- Verify if the column changes made during configuration appear on the lead list page.
- Click the filter button located on the top right corner of the page.
- Ensure that the changes made to the filters are reflected correctly.
How to (for mobile app)
- Log in to Vymo web app and navigate to self serve.
- Go to Global Settings > JSON Configurations >
additionalconfigs. - Expand
additionalconfigs>leads_list_filters_v2. - If you don't find
leads_list_filtersv2, add it. - Add objects under
leads_list_filtersv2key. -
For each object, add the following parameters. If the following parameters already exist, set their values according to your requirements.
- The
codekey is unique identifier to the filter. - The
hintkey determines the field name on filter. - The
queryExprKeykey used for query purpose.
{ "type": "text", "code": "name", "hint": "Lead Name", "queryExprKey": "inputs_map.name", "data_type": "text" } - The
-
Click Save. You see a message that the changes are now saved as a draft.
- In the message box, click Go To Release Management so that you can move the changes permanently to the live configuration.
- Click Create a UAT release. Specify the release details and make sure to enter your own email ID because that's where you receive a one-time password (OTP) to continue with the process. Click Proceed.
- Enter the OTP you received in the email, and click Submit. Wait for a while till you see a confirmation message saying the process is complete.
- To see the changes, log out and log in again.
Results (for mobile app)
- Log in to Vymo mobile app
- Go to leads card.
- Click the filter icon located on top right to see the results.

Note
If you cannot locate JSON objects under additionalconfigs, create them.