How to associate multiple records with an activity
Sometimes, a single activity might need to be tagged with more than one lead or partner. For example, a single visit to a bank branch might need meetings with more than one person at that branch. To be able to associate an activity with multiple records, you must first enable the multi-record option and then specify the number of records that a single activity can be associated with. When enabled, the effect is that an app user is able to select more than one record while creating an activity.
How to
- Log in to the Vymo web app and click the gear icon :octicons-gear-16: in the upper-right corner of the screen.
- In the Module Settings section, click the module that contains the activity. Then, click Activity Management.
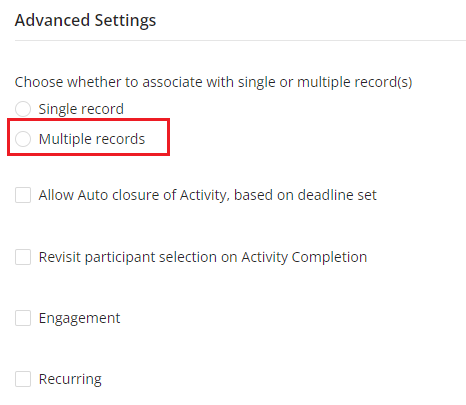
- On the menu at the left, select the activity and scroll to the Advanced Settings section.
- In Choose whether to associate with single or multiple record(s), select Multiple records.
- Click Save near the top right.
- Return to the self serve home page. Then, in Global Settings, click JSON Configurations.
- On the menu at the left, locate the
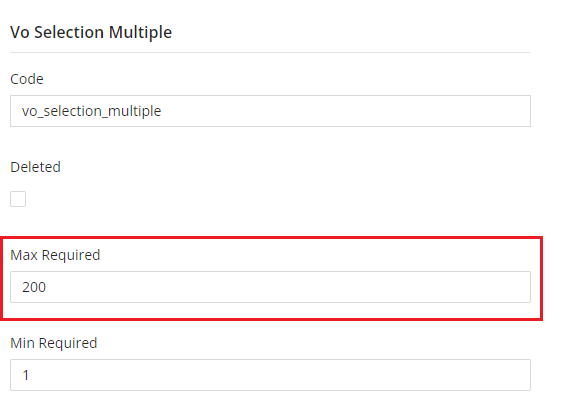
Vo Selection Propsobject. Scroll to the Vo Selection Multiple section. -
In the Max Required field, specify the number of records that can be associated with the activity. This number should be an integer between 1 and 200.
Field not editable
If the Max Required field is not editable, use the JSON editor pane to specify the number in the
vo_selection_multiple.maxRequiredparameter.1 2 3 4 5 6 7 8 9 10 11 12 13 14 15 16
{ "vo_selection_single": { "code": "vo_selection_single", "deleted": false, "maxRequired": 1, "minRequired": 1, "contextFilterMappings": null }, "vo_selection_multiple": { "code": "vo_selection_multiple", "deleted": false, "maxRequired": 200, "minRequired": 1, "contextFilterMappings": null } } -
Click Save near the top right. Then, release the changes.