How to enable Coach Hello screen for specific roles
As a manager, the cards you see in the Hello screen is different from those who are not managers. If your company has signed up for Manager Experience, the Coach Hello Screen is the default view for all managerial roles. You can choose to specify roles that see this screen through the self-serve.
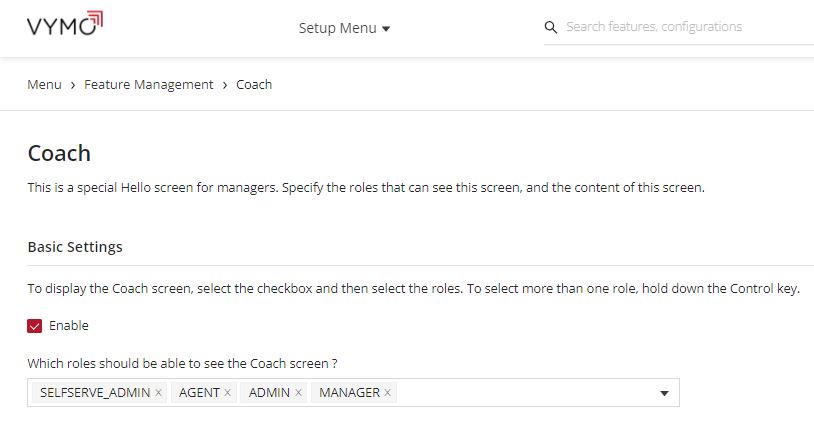
How to
Specify the roles that can see the Hello screen by following these steps:
- Log in to the Vymo web app and click the gear icon :octicons-gear-16: in the upper-right corner of the screen.
- Locate Global Settings and click Feature Management.
- Click Coach and click Enable. Specify the roles that can see the Coach screen.
Making the Coach Hello screen unavailable or available for a specific role through JSON
The Coach Hello Screen is displayed to all people who have at least one person reporting to them, or those who have the manager role assigned to them. To disable the Coach Hello Screen for a specific role, you first get the role code for that role and then you add it to an exclusion list.
- Log in to the web app.
- Click Customize > Global Settings > JSON Configurations.
- Locate the
scopesobject and get the code for the role to exclude. - Locate
features, and the array formanager_view. -
In the
scopeMappingslist, specify the role codes. For example, the following code makes the Coach Hello screen available for two roles,tsmandcircle_manager. To make the screen unavailable, set thedisabledflag totrue. Set it tofalseto make the screen available."scopeMappings" : [ { "disabled" : false, "order" : null, "scope" : "tsm" }, { "disabled" : false, "order" : null, "scope" : "circle_manager" } ], -
Click Save. You see a message that the changes are now saved as a draft.
- In the message box, click Go To Release Management so that you can move the changes permanently to the live configuration.
- Click Create a UAT release. Specify the release details and make sure to enter your own email ID because that's where you receive a one-time password (OTP) to continue with the process. Click Proceed.
- Enter the OTP you received in the email, and click Submit. Wait for a while till you see a confirmation message saying the process is complete.
- To see the changes, log out and log in again.